እንዴት ላፕቶፕ ላይ ስክሪንስሆቶች እንደሚወስዱ የመጨረሻ መረጃ
እንዴት በላፕቶፕ ላይ ስክሪን ምስሎች ማንበብ ይማሩ በእኛ የመጨረሻ መመሪያ ይማሩ። በWindows, macOS, ChromeOS እና Linux ላይ የስክሪን ካፕቸር ማስተላለፊያ በተግባር መረጃዎች እና መሣሪያዎች ይማሩ።
የተመነጨ ማስተካከያዎች
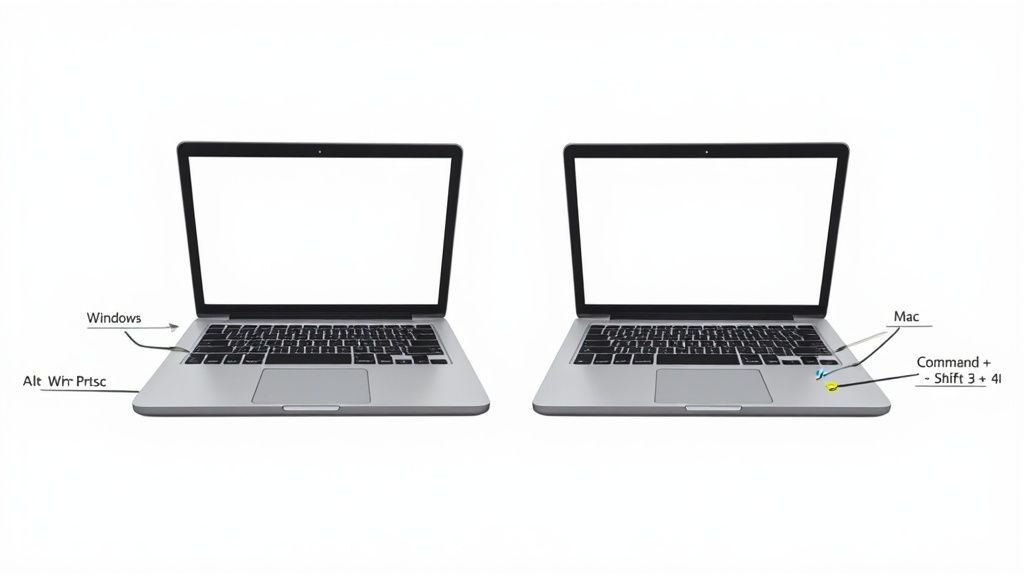
So, you need to grab a screenshot on your laptop? It's actually one of the simplest things you can do. For a quick full-screen grab, just hit the PrtSc key on a Windows machine or press Command+Shift+3 on a Mac. That's it. These shortcuts are the most direct way to capture exactly what’s on your display in an instant.
Your Instant Guide to Laptop Screenshots
Knowing how to capture your screen is a fundamental skill for just about everything we do online. It's how you save important information, create quick tutorials for colleagues, or just share a funny moment from a video call. Learning the right commands isn't just a party trick; it genuinely makes your workflow smoother and faster. Think about it: instead of typing out a long description of a software bug, you can just send a picture.
Why Screenshot Skills Matter
In any fast-moving job, clear communication is king. Sending a quick, annotated image gets your point across in seconds, whereas a long, descriptive email might take minutes to write and even longer to understand. This guide gets straight to the point, giving you the fastest methods for the most common operating systems so you can get the shot you need without any fuss.
Believe it or not, the screenshot function has been around since Windows 1.0 launched way back in 1985. Fast forward to 2025, and with desktop usage still accounting for 38.1% of global web traffic, laptops are as crucial as ever. The Print Screen (PrtSc) key remains a staple on Windows laptops, which dominate the market with a 70.21% share, while macOS holds a solid 5.5%.
Beyond the Basics
While the built-in tools are fantastic for quick snaps, sometimes you need a little more muscle. A classic example is trying to capture an entire scrolling webpage, which standard tools just can't do. For that, you'll need something more specialized. We've actually put together a guide on how to take a full-page screenshot using browser extensions that make it easy.
The real productivity gain comes from knowing which tool to use for the job. A simple key combination is perfect for a quick grab, but a dedicated tool is better for complex captures that require annotation or sharing.
For a handy reference, I've put together a table with the most common shortcuts you'll need.
Quick Screenshot Shortcuts for Laptops
This table summarizes the most useful keyboard shortcuts for taking screenshots on Windows and macOS laptops. Keep it bookmarked for a quick reminder.
| Operating System | Action | Keyboard Shortcut | Result |
|---|---|---|---|
| Windows | Full Screen to Clipboard | PrtSc |
Copies the entire screen to clipboard |
| Windows | Full Screen to File | Win + PrtSc |
Saves the entire screen to Pictures folder |
| Windows | Active Window to Clipboard | Alt + PrtSc |
Copies the current active window |
| Windows | Custom Area (Snipping Tool) | Win + Shift + S |
Opens Snipping Tool for selection |
| macOS | Full Screen to File | Command + Shift + 3 |
Saves the entire screen to desktop |
| macOS | Custom Area to File | Command + Shift + 4 |
Lets you select an area to save |
| macOS | Window/Menu to File | Command + Shift + 4 + Space |
Captures a specific window or menu |
| macOS | Open Screenshot App | Command + Shift + 5 |
Opens the Screenshot app with more options |
Having these shortcuts at your fingertips will save you a ton of time, whether you're capturing a receipt, reporting a bug, or just saving a great idea.
Taking Great Screenshots on Windows Laptops
If you’re one of the millions of people using a Windows laptop, knowing how to quickly grab a screenshot is a non-negotiable skill. It's something I do dozens of times a day. Windows has you covered with a surprisingly deep set of tools, from classic keyboard shortcuts that have been around forever to a much more modern and flexible app.
Figuring out which method to use can save you a ton of time. Whether you need to capture your entire screen for a presentation, snag a weird error message, or just clip out a specific part of a website, there’s a perfect tool for the job.
The Old Faithful: Print Screen Key
The most straightforward way to take a screenshot on Windows is with the Print Screen key. You'll usually see it labeled as PrtSc, PrtScn, or something similar. It might seem basic, but its function changes depending on what other keys you hold down.
Here’s the breakdown:
- Just the PrtSc Key: Hitting this captures your entire screen (or screens, if you have a multi-monitor setup) and copies it to your clipboard. It won't save a file automatically. You have to paste it somewhere—like Paint, Word, or an email—to see and save it.
- Alt + PrtSc: This one is much more precise. It captures only the active window. I find this incredibly handy for grabbing a specific program or dialog box without all the clutter of my desktop and taskbar. Like the basic PrtSc, it copies the image to your clipboard.
- Windows key + PrtSc: This is your go-to for saving a full-screen screenshot directly as a file. When you press this combo, the screen will dim for a second to let you know it worked. The image is instantly saved as a PNG file in your
Pictures > Screenshotsfolder.
My Personal Tip: When I'm putting together a quick guide for a colleague, I almost always use Alt + PrtSc. It keeps the screenshot clean and focused on exactly what they need to see, making the instructions much easier to follow.
Getting Precise with the Snipping Tool
For those moments when you need more control, the Snipping Tool is your best friend. In newer versions of Windows, it's often called Snip & Sketch, and it's built right in. You can pull it up instantly with one of my favorite shortcuts: Windows key + Shift + S.
Pressing that combo dims your screen and pops up a small toolbar at the top, giving you four different ways to capture your screen.
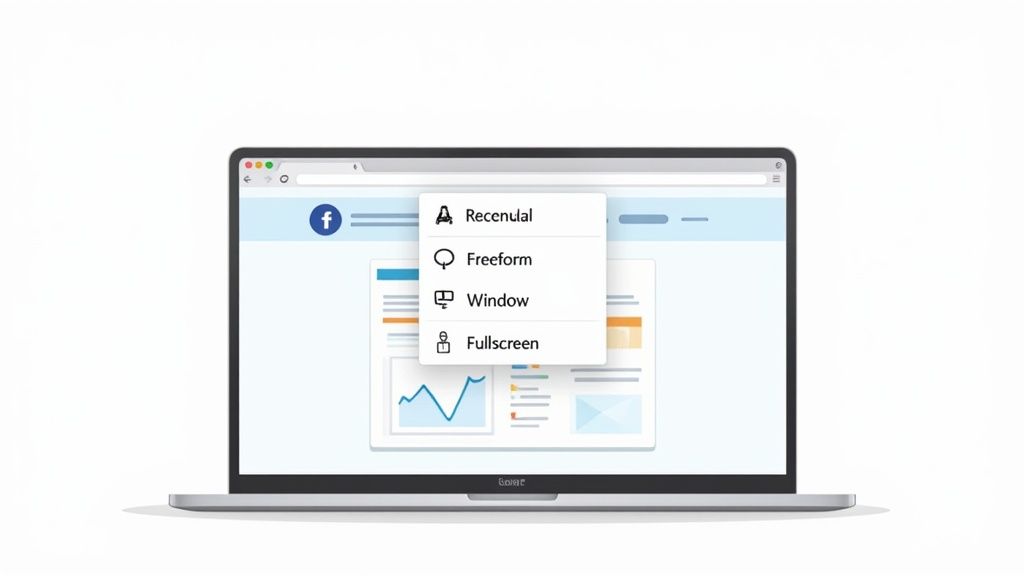
This little menu gives you immediate access to its four powerful capture modes, so you can pick the perfect tool for the task without skipping a beat.
A Closer Look at the Four Snipping Modes
Each mode is designed for a specific job, which means you can get exactly what you need without having to crop it later.
- Rectangular Snip: This is the default and what I use most often. Your cursor becomes a crosshair, letting you click and drag a box around whatever you want to capture.
- Freeform Snip: This is where it gets creative. You can draw any shape you want, and it will only capture what's inside your line. It's perfect for grabbing an odd-shaped logo or a curved chart from a busy webpage.
- Window Snip: This mode is super smart. Just hover your mouse over any open window, and it will highlight it. One click, and it captures that window perfectly, leaving everything else out.
- Fullscreen Snip: No surprises here—this captures your entire screen, just like the
Windows key + PrtScshortcut.
Once you take a snip, the image is copied to your clipboard, and a little notification pops up. Clicking that notification is the magic step. It opens your screenshot in an editor where you can immediately draw, highlight, crop, and save it.
This built-in editing is a massive time-saver. As of May 2025, Windows 11 has a 43.22% desktop market share, and its advanced screenshot tool is a big reason why. In fact, data suggests that 70% of users rely on the Win + Shift + S shortcut for its instant editing features. In our modern hybrid work world, being able to communicate visually is key. Good screenshots are estimated to cut the time spent explaining complex issues by up to 50%—a huge impact when you consider the 193.6 million laptops shipped annually. You can learn more about the global OS market share on Procurri.com.
Capturing Your Screen on a MacBook
If you're on a Mac, you're in luck. The screenshot tools built into macOS are some of the most intuitive and powerful around, perfect for everything from creative projects to professional work. Taking a screenshot is incredibly quick, relying on a few key shortcuts that every Mac user should commit to memory.
These commands are your direct line to capturing exactly what you need, right when you need it. No more digging through applications—the tools are always just a key press away.
Your Go-To MacBook Screenshot Shortcuts
Let's start with the two most fundamental commands. First up is Command + Shift + 3. This is the one you use to instantly capture your entire screen. The moment you press it, you'll hear that familiar camera shutter sound, and a little thumbnail of your screenshot will pop up in the corner before saving right to your desktop. It’s perfect for grabbing everything in one go.
For more focused captures, your best friend will be Command + Shift + 4. This shortcut turns your cursor into a set of crosshairs, letting you click and drag to select the exact portion of the screen you want. I use this all the time for isolating a single paragraph, a chart in a report, or a cool design element on a website.
This simple guide helps visualize which shortcut to use for the most common needs.
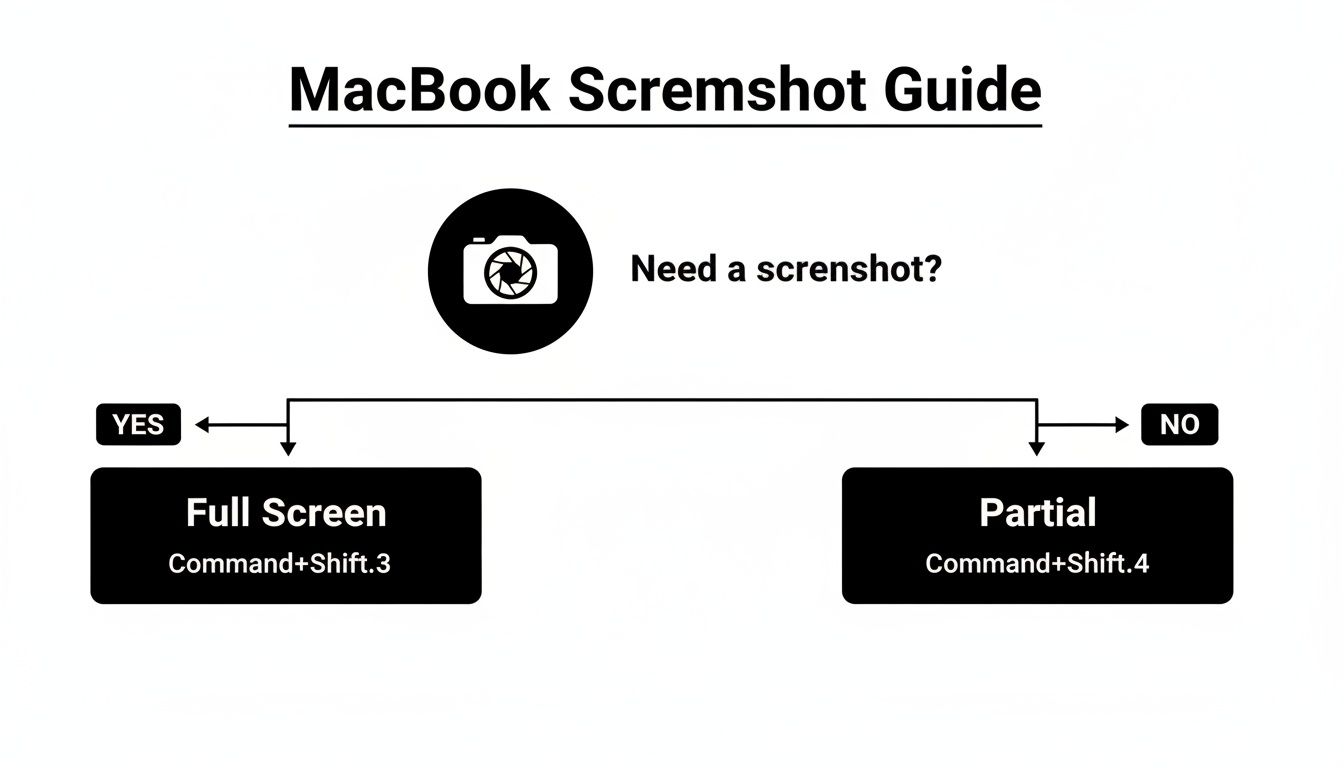
As the chart shows, your choice boils down to whether you need the whole screen or just a piece of it, pointing you to the right key combo instantly.
Mastering Window and Menu Captures
Here’s a tip that feels like a secret handshake once you learn it. After hitting Command + Shift + 4, don't drag the crosshairs. Instead, tap the spacebar. Your cursor will magically transform into a camera icon.
Now, just hover over any open window, menu, or even the Dock, and you'll see it highlight. A single click captures only that element, complete with a clean, professional-looking drop shadow.
This method is my absolute favorite for creating tutorials. It isolates the window perfectly, making the final image look polished and focused without any tedious manual cropping. It’s a small detail that makes a huge difference.
The Power of the Screenshot App
While the keyboard shortcuts are fantastic for quick grabs, the real command center is the Screenshot app. You can bring it up by pressing Command + Shift + 5. This summons a small control panel at the bottom of your screen, unlocking a whole new level of functionality.
This is where you move beyond simple snapshots and into more advanced territory. The on-screen toolbar gives you clear icons for capturing the entire screen, a specific window, or a selected portion—just like the shortcuts.
But the Screenshot app is so much more than that. It's your gateway to screen recording and a bunch of other handy customization options.
Exploring Advanced Options and Screen Recording
Inside the Screenshot app's control panel, click the "Options" menu. This is where you can really start to tailor the experience to fit your workflow.
Here are a few things you can do:
- Set a Timer: You can add a 5 or 10-second delay before the screenshot is taken. This is a lifesaver for capturing menus or other interface elements that only appear when your mouse is hovering over them.
- Change Save Location: By default, screenshots land on your desktop, which can get messy fast. You can easily change the destination to your Documents folder, Clipboard, or any other spot you prefer.
- Show or Hide Mouse Pointer: For creating clean-looking guides, you might want to hide the pointer. This option lets you toggle its visibility in the final image.
The Screenshot app isn't just for static images, either. It also includes two powerful screen recording tools. You can choose to record your entire screen or just a selected portion, making it a breeze to create a quick video tutorial or document a software bug in action. Once you stop recording, a thumbnail pops up, letting you trim and save the video without ever opening a separate editor.
Advanced Screenshot Techniques and Tools
Once you've nailed the basic keyboard shortcuts, you'll eventually hit a wall. There are just some situations where the built-in tools don't quite cut it. What happens when you need to capture an entire webpage that scrolls for miles? This is a constant headache for web designers, marketers, and anyone trying to document long-form content.
This is exactly where more advanced tools step in. They transform a simple screen grab into a genuinely useful visual asset, offering features like scrolling capture, detailed annotations, and easy cloud sharing that will completely upgrade your workflow.
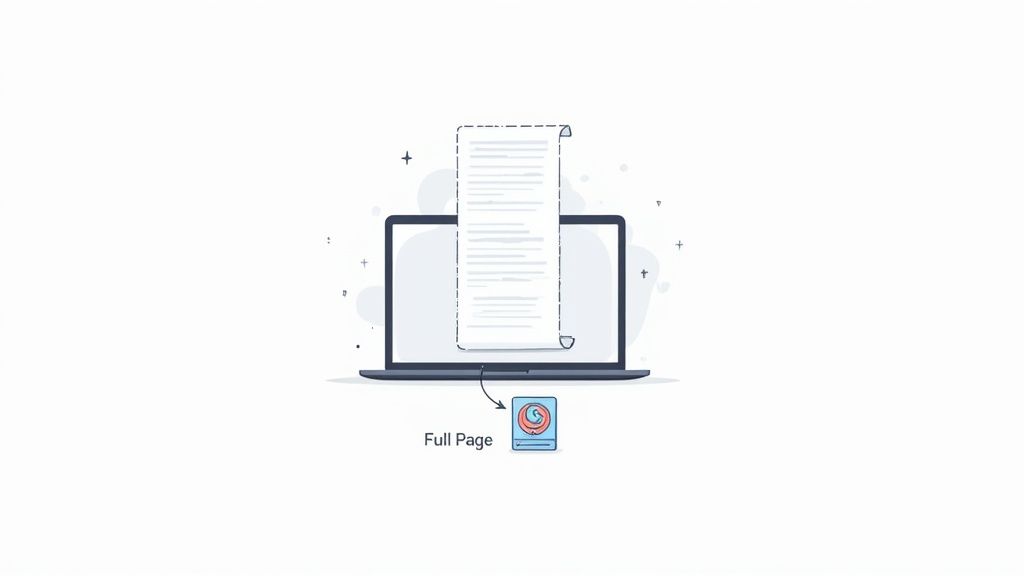
The image above perfectly illustrates the challenge of grabbing content that isn't immediately visible—a task where specialized tools truly shine.
Capturing Full Scrolling Pages
One of the most common "how do I do this?" questions is about taking a scrolling screenshot. Think about trying to save a full product page, a lengthy article, or a detailed analytics dashboard. Trying to stitch multiple screenshots together is not only tedious but almost always looks messy and unprofessional. Thankfully, you've got some great options.
Most modern browsers like Google Chrome and Firefox actually have this capability built into their developer tools. While powerful, this method can be a bit technical and isn't the most intuitive, often requiring you to poke around in menus and run specific commands.
A much, much simpler approach is to use a browser extension. Tools like ShiftShift's Full Page Screenshot are designed to do one thing and do it perfectly. With just a click, you can capture an entire webpage from top to bottom, saving it as a single, seamless image. It’s an absolute game-changer if you frequently need to archive or share web content.
Exploring Powerful Third-Party Apps
Looking beyond browser extensions, you'll find dedicated third-party applications that offer a whole suite of features that can completely change how you think about screenshots. These tools are built for power users who need more than just a quick capture.
It’s worth noting just how central this functionality is. The global laptop market hit an incredible USD 186.3 billion in 2023, split between $124.8 billion for traditional laptops and $61.5 billion for 2-in-1s.
Core productivity features like screenshotting are a big deal for these users. On Windows, which dominates with a 70.21% OS share, people on compact laptops often rely on the Fn + PrtSc combo. In the Asia-Pacific region, efficiency studies from 2024 even showed a preference for Windows + Shift + S because selective snips can cut file sizes by as much as 60% compared to full-screen grabs.
This is where third-party apps come into their own, offering capabilities that standard tools just can't match:
- Advanced Annotation: Go way beyond a simple highlight. Add professional-looking arrows, text boxes, blur sensitive information, and even create numbered steps directly on your image.
- Cloud Integration: Automatically upload your screenshots to services like Dropbox or Google Drive and get a shareable link copied to your clipboard instantly.
- Automated Workflows: Set up rules to automatically capture specific parts of your screen at set times or build complex multi-step visual guides.
So many people stick with the default tools for years, not realizing how much time they're losing on small, repetitive tasks like blurring out a name or adding a few arrows. A good dedicated app makes these actions feel effortless and quickly becomes an indispensable part of a productive workflow.
If you’re looking for a powerful yet accessible tool, checking out a free Snagit alternative is a great way to see just how much more efficient your screenshot process can become.
Choosing the Right Screenshot Tool
So, should you stick with built-in tools, grab a browser extension, or invest in a dedicated app? The answer really depends on what you need to do. For a quick, one-off capture, the native options are perfect. For web-specific tasks, a browser extension is your best friend. But for anyone who uses screenshots as a core part of their daily communication, a full-featured third-party app is a more than worthwhile investment.
To make the choice easier, here's a quick look at how these tools stack up against each other.
Comparison of Screenshot Tools
| Feature | Built-in Tools (Snipping Tool, macOS Screenshot) | Browser Extensions (e.g., ShiftShift) | Third-Party Apps (e.g., Snagit, Greenshot) |
|---|---|---|---|
| Scrolling Capture | Not available | Excellent for web pages | Yes, for apps and web pages |
| Advanced Annotation | Basic (pen, highlighter) | Limited to basic shapes and text | Extensive (blur, steps, callouts, effects) |
| Video Recording | Basic (macOS only) | Not typically included | Advanced features with editing |
| Cloud Sharing | Manual upload required | Sometimes available | Built-in with automatic link generation |
| Workflow Automation | None | None | Yes, with templates and custom presets |
| Best For | Quick, simple captures | Capturing entire web pages quickly | Professional tutorials, bug reports, daily use |
Ultimately, the goal is to make your screenshots work for you. With the right tool, they stop being simple images and become clear, actionable, and powerful communication assets.
Screenshots on ChromeOS and Linux Laptops
Let's venture beyond the usual suspects. While Windows and macOS get most of the spotlight, plenty of us live our digital lives on Chromebooks and various flavors of Linux. The good news? Taking a screenshot on these systems is just as easy, and in some ways, even more streamlined.
If you're using a Chromebook, you know the whole experience is built around speed and simplicity. Capturing your screen is no different. You won't be digging through menus; it's all about a couple of quick keyboard shortcuts.
How to Take a Screenshot on a Chromebook
The process for capturing your screen on a Chromebook will feel familiar if you've ever used a Mac, but with a unique twist. The key to everything is the Show Windows key—it’s the one that looks like a rectangle with lines next to it, sitting right where you'd expect to find F5.
Here are the two shortcuts you'll use all the time:
- To grab the whole screen: Press Ctrl + Show Windows. You'll see a quick flash, and a notification will pop up confirming your screenshot is saved.
- To capture just a specific area: Use Ctrl + Shift + Show Windows. Your mouse pointer will morph into a crosshair. Just click and drag to select the exact part of the screen you need.
As soon as you take the shot, ChromeOS tucks it away safely in your "Downloads" folder. That little notification in the corner is super handy, letting you jump straight to the folder or copy the image to your clipboard to paste into a Google Doc or email.
I’ve found that using Ctrl + Shift + Show Windows for almost everything is a real time-saver. It completely cuts out the step of having to crop a full-screen image later on, which also keeps my "Downloads" folder from becoming a cluttered mess. It’s a small tweak to your workflow that makes a big difference.
For simple tweaks, the built-in Gallery app is surprisingly good. You can quickly crop, rotate, or make light adjustments without needing to hunt down another app.
Navigating Screenshots in the Linux World
Linux is all about choice, and that extends to how you take screenshots. The exact method can differ a bit depending on your distribution (like Ubuntu or Fedora) and your desktop environment (GNOME, KDE, etc.). Don't let that intimidate you, though. Most modern versions of Linux come with a great graphical tool right out of the box.
For example, if you're on a popular distro like Ubuntu, which runs the GNOME desktop, the tool is simply called "Screenshot." Just find it in your applications menu, and you're good to go.
Using the GNOME Screenshot Tool
When you open the Screenshot app, you'll see a small, straightforward window with a few options. It's designed to give you exactly the capture you need without any fuss.
Here's what you can do with it:
- Screen: Grabs a picture of your entire desktop, multiple monitors and all.
- Window: Lets you click on a specific application window to capture just that.
- Selection: Turns your cursor into a tool to draw a box around the area you want.
One of its most underrated features is the built-in delay. I use this all the time. If you need to capture a drop-down menu or a hover state, setting a delay of 5 or 10 seconds gives you enough time to get everything in place before the shutter clicks. It’s a lifesaver for anyone creating tutorials or technical guides.
Of course, this is Linux, so there's always a command-line option for power users. A classic, lightweight tool for this is scrot. Pop open a terminal and type scrot my-screenshot.png, and it will instantly save a full-screen image. This method is perfect for scripting, letting developers and system admins automate screen captures as part of a larger workflow.
Troubleshooting Common Screenshot Issues
So you’ve tried to take a screenshot, and... nothing happened. It’s a surprisingly common hiccup. One of the biggest complaints I hear, especially from Windows users, is that the Print Screen (PrtSc) key seems to be completely dead.
Don't panic! It’s rarely a hardware problem. On most modern laptops, that key often pulls double duty. Before you do anything else, try holding down the Fn key and then pressing PrtSc. This combo is often needed to activate its main function.
If that doesn't work, another likely culprit is a background app. Cloud storage services like OneDrive or Dropbox love to "help" by automatically taking over the Print Screen key to save screenshots directly to their folders. A quick dive into their settings will usually let you disable this and get your key back.
Why Your Screenshot Is Just a Black Screen
Ever tried to grab a still from a Netflix show or capture an epic moment in a game, only to end up with a useless black rectangle? This is a classic problem, and it's almost always caused by something called hardware acceleration.
Basically, your browser or game is handing off the hard work of rendering graphics directly to your dedicated graphics card (GPU) to keep things running smoothly. The downside is that this direct pipeline often bypasses the very system your screenshot tool is trying to read.
The Quick Fix: Pop into your browser’s settings (usually under 'System' or 'Advanced') and temporarily switch off hardware acceleration. Take your shot, then remember to turn it back on so your videos and animations don't get choppy. For games, switching from full-screen to a borderless windowed mode often does the trick.
Solving Blurry or Low-Quality Screenshots
This one is really frustrating. You take a screenshot, it looks sharp on your screen, but the saved file is blurry, fuzzy, or just plain low-quality. What gives?
Nine times out of ten, this is a display scaling issue. If you have a laptop with a high-resolution screen, your operating system is probably scaling everything up—text, icons, windows—to 125% or 150% just so you can read it without squinting.
Sometimes, screenshot tools get confused by this. They might capture the image at the "real" un-scaled resolution, which then looks pixelated when viewed.
Your first step should be to check your display settings and make sure your screen is set to its native, "recommended" resolution. It's also worth checking for a graphics driver update; outdated drivers can cause all sorts of weird rendering glitches that affect capture quality.
Got Questions About Screenshots? We've Got Answers
Even with all the shortcuts and tools, a few questions always seem to come up when you're trying to master screenshots on your laptop. Let's get those common head-scratchers sorted out right now.
Where Do My Screenshots Go by Default?
This is probably the number one question I hear. It's easy to lose track of where your laptop stashes these files.
On a Windows machine, when you use the Win + PrtSc key combo, your screenshot is automatically saved in a dedicated folder. You'll find it under Pictures > Screenshots.
If you're on a Mac, things are even more straightforward. Your screenshots will pop up directly on your desktop, ready for you to use.
For Chromebook users, your captures are filed away neatly in your "Downloads" folder.
How Can I Capture Just One Window?
Grabbing your entire screen is often overkill.
አንድ ፕሮግራም ወይም መስክ ብቻ ማይወድድ ከሆነ እንደዚህ ያለ አንድ እጅግ ዝርግ መንገድ አለ።
በWindows ላፕቶፕ ላይ የሚፈልጉትን መስክ ይጫኑ፣ ከዚያ Alt + PrtSc ይጫኑ። ይህ የእንደዚያ መስክ በእርግጥ የተሳሳተ ምስል ወደ ክሊፕቦርድዎ ይቀይር።
በmacOS ላይ የተመለከተው አንድ ምርጥ ነው Command + Shift + 4 ነው። እንደ ወቅታዊ የሚነቃቃ ይሆናል፣ ነገር ግን ምንም አቅርቦት አይደርስም። አንድ የምርጥ ወይም የተለየ አይነት ይጫኑ። እንደዚህ ይሆናል የአይነት አይነት እንደ ካሜራ አይነት ይሆናል። አሁን የምንም መስክ ማይወድድ ይችላሉ።
ሰዎች በጣም በሙሉ የምስል ማይወድድ ይወዳሉ እና ከዚያ በጣም ይቀይር ይወዳሉ። እባኮትን የተገናኝ መስክ የሚወድድ አይነት ይማሩ፣ ምንም እንኳን የምስል ይወዳሉ ይቀይር ይችላሉ።
የምስል ማይወድድ በአሁኑ ጊዜ ማሻሻያ ይችላል?
እምነት አለ። ዘመናዊ የማሽከርከር ስርዓቶች ይህን ዓይነት የቀላል የስራ ሂደት ይሰርዝ።
በWindows እና macOS ሁለቱም በምስል ማይወድድ ወቅት አንድ ትንሽ ተመልክታ ይቀርባል። ይቅርታ አትቀይርም! ይህን ተመልክታ ማይወድድ ይነቃቃ ይኖርባቸው።
ይህ የምስል ይቀይር ይችላል፣ ይህ ይህ ይቀይር ይችላል፣ ይህ ይህ ይቀይር ይችላል፣ ይህ ይህ ይቀይር ይችላል። ይህ ይህ ይቀይር ይችላል።
በእርግጥ የምስል ይቀይር ይችላል፣ ይህ ይህ ይቀይር ይችላል፣ ይህ ይህ ይቀይር ይችላል።