Praktični vodič za pronalaženje najboljeg AVIF u JPG konvertera
Otkrijte najbolji AVIF u JPG konverter za bilo koji radni tok. Saznajte kako da konvertujete slike lokalno radi privatnosti, online radi brzine, ili u velikim količinama pomoću CLI alata.
Preporučene ekstenzije
Imati AVIF to JPG konverter u svom alatu je ključno za one trenutke kada univerzalna kompatibilnost nadmašuje vrhunsko kompresovanje. Iako je AVIF fantastičan format, alat fokusiran na privatnost, kao što je ShiftShift ekstenzija, je savršeno rešenje za prebacivanje fajlova nazad na stari pouzdani JPG—sve to bez otpremanja vaših osetljivih podataka na nasumični server.
Zašto Vam Još Uvek Treba Pouzdan AVIF to JPG Konverter
AVIF (AV1 Image File Format) je impresivan, moderan format slika napravljen za web. Uspijeva da spakuje neverovatnu kvalitetu u veličinu fajla koja je samo deo onoga što stariji formati poput JPG-a zahtevaju. Ali ta novina je takođe njegova najveća slabost: ne zna svaka aplikacija, platforma ili stariji uređaj šta da radi s njim još uvek.
Ovo je upravo razlog zašto je pouzdan AVIF to JPG konverter još uvek toliko važan. Zamislite ovo: vi ste dizajner koji je upravo kreirao briljantan set web grafika u AVIF-u. Klijent je oduševljen, ali njihov stari sistem za upravljanje sadržajem će prihvatiti samo JPG ili PNG fajlove. Ili možda želite da pošaljete porodičnu fotografiju putem email-a, ali znate da će email klijent vaše tetke verovatno samo prikazati ikonu pokvarene slike umesto AVIF fajla.
Razumevanje Razlike u Kompatibilnosti
Sve se svodi na usvajanje. Dok su svi glavni moderni pregledači na brodu sa AVIF-om, mnoštvo drugih softverskih rešenja jednostavno nije uhvatilo korak. Ova razlika može ozbiljno otežati rad programerima, fotografima i kreatorima sadržaja. Dobar konverter deluje kao most, omogućavajući vam da iskoristite male veličine fajlova AVIF-a za web performanse, dok i dalje imate rezervu koja funkcioniše svuda drugde.
Potražnja za AVIF to JPG konverterima je naglo porasla zajedno sa usvajanjem AVIF-a. Nije ni čudo, s obzirom na to da AVIF može smanjiti veličine fajlova za neverovatnih 50-70% u poređenju sa JPG-om slične kvalitete. Ali čak i uz podršku pregledača koja dostiže 95% globalno, još uvek postoje bezbrojni nasleđeni sistemi i stariji programi koji zahtevaju univerzalnu kompatibilnost JPG-a. Tu dolaze alati poput lokalnog pregledača konvertera iz ShiftShift-a, jer mogu obraditi serije JPG, PNG, WebP i AVIF fajlova direktno na vašem računaru, potpuno offline.
Da bismo pomogli vizualizaciji razlika, evo brzog pregleda kako se dva formata porede.
AVIF vs JPG Na Prvi Pogled
| Karakteristika | AVIF | JPG |
|---|---|---|
| Kompresija | Superiorna; značajno manji fajlovi za istu kvalitetu. | Dobra, ali su fajlovi mnogo veći od AVIF-a. |
| Kompatibilnost | Raste, ali još nije univerzalna. Podržan od modernih pregledača. | Izvrsna; podržan od gotovo svih uređaja i softvera. |
| Transparentnost | Podržava alfa transparentnost (kao PNG). | Ne podržava transparentnost. |
| Animacija | Podržava animirane sekvence (kao GIF). | Ne podržava animaciju. |
| Najbolje Za | Web grafike, fotografije visoke kvalitete gde je veličina fajla kritična. | Opšta fotografija, email, društvene mreže, štampa. |
Na kraju, AVIF je budućnost za web performanse, ali JPG ostaje neosporni kralj kompatibilnosti za sada.
Kada je JPG Još Uvek Jedina Opcija
Ponekad jednostavno nemate izbora. Evo nekoliko stvarnih scenarija gde ćete gotovo sigurno morati da konvertujete AVIF u JPG:
- Društvene Mreže: Većina platformi je izbirljiva u vezi sa onim što otpremate. Moguće je da neće ispravno prikazati AVIF fajlove ili ih mogu potpuno odbiti.
- Email Prilozi: Ako želite da budete 100% sigurni da vaš primalac može videti sliku koju ste poslali, JPG je jedina sigurna opcija.
- Nasleđeni Softver: Razmislite o starijim verzijama alata za dizajn, kancelarijskog softvera ili onog starog internog alata koji vaša kompanija koristi. Verovatno nemaju pojma šta je AVIF.
- Štampana Medija: Svet štampe funkcioniše na dobro uspostavljenim radnim tokovima, a ti su izgrađeni oko formata kao što su TIFF i JPG visoke kvalitete.
Biranje pravog formata zavisi od konteksta. Ako želite da istražite ovu temu dalje, naš vodič o odabiru najboljeg formata slika za web je odlično mesto za početak.
Metod Fokusiran na Privatnost za Instant Konverzije u Pregledaču
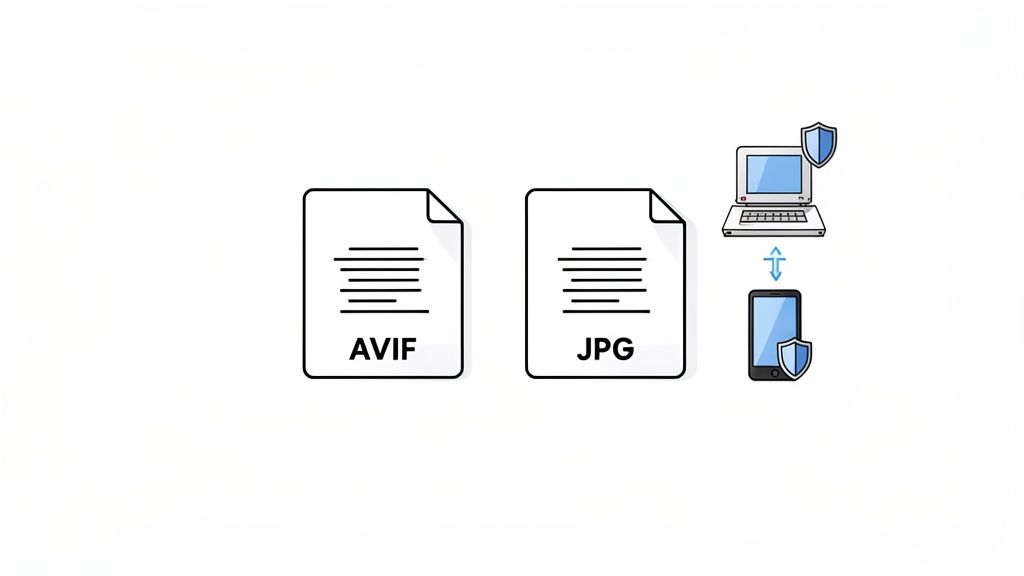
Kada radite sa osetljivim ili vlasničkim slikama, otpremanje na nasumičnu veb stranicu jednostavno nije opcija. Tu se pojavljuje konverter AVIF to JPG fokusiran na privatnost, koji zaista blista. Umesto da šaljete svoje fajlove u divljinu, cela konverzija se dešava direktno na vašem računaru.
Alati poput ShiftShift Chrome ekstenzije su napravljeni upravo za ovaj scenario. Brzo dvostruko pritiskanje tastera Shift otvara paletu komandi. Odatle, samo pronađite konverter slika, prevucite svoje AVIF fajlove na njega i odmah dobijate svoje JPG-ove nazad. Vaši fajlovi nikada ne napuštaju vaš računar, što vam daje potpun mir.
Ovaj pristup lokalno-prvo je takođe o brzini i pogodnosti. Ne morate čekati u redu za otpremanje ili se suočavati sa sporim obradama servera. Kada je ekstenzija instalirana, čak vam nije potrebna ni internet konekcija. To je savršena postavka za dizajnere, programere ili bilo koga ko treba brzu, pouzdanu konverziju bez rizika za svoje podatke.
Zašto Lokalna Konverzija Ima Značaj za Vaš Radni Tok
Razumevanje razlike između lokalne i server-side obrade je ključno. Kada koristite tipični online konverter, suštinski predajete svoje fajlove trećoj strani. Za nekoliko fotografija sa odmora, to može biti u redu. Ali za neobjavljene proizvode, klijentske makete ili poverljive dizajne, to je kockanje koje ne treba da preuzimate.
In-browser konverter koji obrađuje fajlove lokalno potpuno eliminiše ovaj rizik. Magija konverzije se dešava unutar sigurnog, izolovanog okruženja vašeg pregledača, što znači da vaši podaci ostaju vaši od početka do kraja.
Ova načela se ne odnose samo na konverziju fajlova. Drugi alati za slike koji stavljaju privatnost na prvo mesto funkcionišu na isti način. Na primer, siguran online resizer slika takođe radi lokalno u pregledaču, osiguravajući da vaše slike nikada ne budu otpremane na server samo da bi se promenila veličina.
Fino Podešavanje Kvaliteta Izlaza
Dobar lokalni konverter bi takođe trebao da vam omogući kontrolu nad konačnom slikom. Pretvaranje AVIF-a u JPG znači ponovnu kompresiju, što može uticati na to kako izgleda. Cilj je postići savršen balans između male veličine fajla i oštre vizuelne kvalitete.
Za većinu situacija, JPG kvalitet između 80 i 95 je idealna tačka. Evo brzog pregleda šta to znači u praksi:
- Kvalitet 90-95: Ovo je vaša opcija za fotografije visoke rezolucije gde svaki detalj ima značaj. Fajl će biti veći, ali nećete primetiti nikakve čudne artefakte kompresije.
- Kvalitet 80-85: Fantastična opcija za web grafike, sadržaj na društvenim mrežama i email priloge. Dobijate lepo smanjenje veličine fajla uz gotovo nikakav uočljiv pad kvaliteta.
- Kvalitet Ispod 75: Koristite ovo samo kada je veličina fajla apsolutni prioritet. Na ovom nivou, mogli biste početi da primetite blokove ili boje u slici.
Sa alatom poput ShiftShift, možete prilagoditi ovu postavku direktno u interfejsu pre konverzije. To vam omogućava da obradite jedan AVIF ili celu seriju sa vašim tačnim preferencama kvaliteta, održavajući vaš radni tok brzim i sigurnim.
Idemo Veliko: Serijska Konverzija AVIF-a sa Desktop i CLI Alatima
Alat zasnovan na pregledaču je fantastičan kada samo konvertujete nekoliko AVIF slika. Ali šta kada se suočavate sa folderom koji sadrži celu fotografsku seriju? Ili migrirate slike sa celog sajta? Kada se suočavate sa stotinama—ili čak hiljadama—fajlova, interfejs za prevlačenje i ispuštanje jednostavno neće biti dovoljan.
Tu dolaze desktop aplikacije i alati za komandnu liniju (CLI) do izražaja. Oni su napravljeni za teže poslove. Ovi alati nude moćne, skriptabilne i automatizovane radne tokove koje alati za pregledače mogu samo da sanjaju. Za programere, sistemske administratore ili bilo koga ko upravlja velikim medijima, oni su jedini pravi izbor.
Automatizacija sa Moći ImageMagick-a
ImageMagick je legendarni open-source alat za gotovo svaku manipulaciju slikama koju možete zamisliti. To je radni konj. Kada ga instalirate, možete pokrenuti moćne serijske operacije direktno iz vašeg terminala.
Recimo da treba da konvertujete svaki AVIF fajl u direktorijumu u JPG visoke kvalitete. Jedna, jasna komanda je sve što vam treba. Ova komanda će proći kroz sve fajlove koji se završavaju sa .avif, konvertovati ih i sačuvati nove JPG-ove dok zadržava originalne nazive fajlova.
Evo komande koju stalno koristim:
magick mogrify -format jpg -quality 85 *.avif
Hajde da to brzo razložimo:
mogrify: Ovo je komanda za modifikaciju slika. Ovde, kreira nove fajlove sa specificiranim formatom.-format jpg: Govori ImageMagick-u da želite JPG kao izlaz. Jednostavno.-quality 85: Postavlja nivo kompresije JPG-a. Smatram da je 85 odlična tačka između veličine fajla i vizuelne kvalitete.*.avif: Ovo je džoker koji primenjuje operaciju na svaki fajl u folderu koji se završava sa.avif.
Korišćenje FFmpeg-a za Više od Samo Videа
Većina ljudi zna FFmpeg kao kralja obrade videa i zvuka, ali je iznenađujuće vešt i u rukovanju konverzijama slika. Ako ga već imate na svom sistemu za video projekte, možete ga koristiti za AVIF to JPG konverzije bez instaliranja bilo čega drugog.
Dok je sintaksa malo drugačija od ImageMagick-a, jednako je moćna, posebno kada je obavijete u jednostavnom shell skriptu za obradu celog foldera. Logika je ista: pronađite sve .avif fajlove i pokrenite komandu za konverziju na svakom od njih.
Moje Dve Pare: Pre nego što pokrenete bilo koju skriptu na velikom folderu, uvek je testirajte na malom poddirektorijumu prvo. Verujte mi, to je jednostavan korak koji može da vas spasi od velike glavobolje poput slučajnog prepisivanja vaših originala ili pogrešnih izlaznih podešavanja.
Serijska Obrada u Adobe Photoshop-u
Za dizajnere i fotografe koji su već duboko u Adobe svetu, Photoshop pruža fantastičan, vizuelan način za rukovanje serijskim poslovima. Trebaće vam dodatak za otvaranje AVIF fajlova, ali kada to postavite, možete koristiti Photoshop-ove "Akcije" za automatizaciju svega.
Akcija je u suštini snimljeni makro. Izvršite niz koraka jednom, a Photoshop ih pamti da bi ih primenio na celu seriju slika.
- Snimite Svoju Akciju: Otvorite jedan AVIF fajl. U panelu Akcija, pritisnite snimanje i zatim sačuvajte fajl kao JPG sa vašim preferiranim podešavanjima kvaliteta. Prestanite sa snimanjem.
- Pokrenite Seriju: Idite na
File > Automate > Batch. - Usmerite na Vaše Foldere: Izaberite Akciju koju ste upravo snimili, odaberite izvorni folder sa vašim AVIF fajlovima i postavite odredišni folder za nove JPG-ove.
Ovaj radni tok vam daje moć Photoshop-ovog vrhunskog motora za obradu slika uz efikasnost automatizacije. Savršeno je ako više volite grafički interfejs od komandne linije. Ova vrsta razmišljanja o serijskoj obradi se takođe primenjuje na druge zadatke koji zahtevaju mnogo podataka; istražujemo sličan koncept u našem vodiču o izradi CSV to Excel konverter radnog toka.
Kako Odabrati Pravi Online AVIF to JPG Konverter
Dok lokalni, u pregledaču konverter pruža najbolje od oba sveta—privatnost i brzinu—ponekad jednostavno trebate brzu, jednokratnu konverziju bez instaliranja bilo čega. Tu online alati mogu biti pravi spas, ali morate biti oprezni. Velika razmena je uvek pogodnost naspram sigurnosti podataka.
Čim koristite tipični online AVIF to JPG konverter, vaša slika se otprema na server treće strane. Ako je to samo generična stock fotografija, nije velika stvar. Ali za vlasničke dizajne, pre-lansirane proizvode ili lične fotografije? To je rizik po privatnost koji možda ne želite da preuzmete.
Na Šta Obratiti Pažnju u Online Konverterima
Kada morate koristiti veb-baziranu uslugu, nemojte samo kliknuti na prvi Google rezultat. Pravi alat zavisi od nekoliko ključnih stvari koje direktno utiču na vaš radni tok i sigurnost. Malo provere unapred može vas spasiti od velike glavobolje kasnije.
Pre nego što otpremite bilo šta, postavite sebi ova pitanja:
- Koja je njihova politika privatnosti? Da li sajt zapravo kaže koliko dugo čuvaju vaše fajlove? Pouzdana usluga će ih automatski obrisati u roku od nekoliko sati. Ako je njihova politika nejasna ili ne postoji, sigurnije je pretpostaviti da čuvaju vaše fajlove neodređeno.
- Da li postoje ograničenja za serijsku obradu? Većina besplatnih online alata ima stroga ograničenja na koliko fajlova možete konvertovati odjednom. Ako imate folder pun slika, izgubićete mnogo vremena otpremajući ih jedan po jedan.
- Koliko su brzi njihovi serveri? Besplatne usluge često guše hiljade korisnika na zajedničkim serverima. To može značiti bolno spore otpremanja i duga čekanja u redu za obradu, što potpuno poništava svrhu "brze" konverzije.
Razmišljanje o ovim tačkama pomaže vam da odlučite da li je brzi online alat dovoljan ili treba da pređete na robusnije desktop ili komandno rešenje.
Ova jednostavna dijagrama jasno razlaže odluku: za nekoliko fajlova, alat za pregledač je u redu; za veliku seriju, komandna linija je vaš prijatelj.
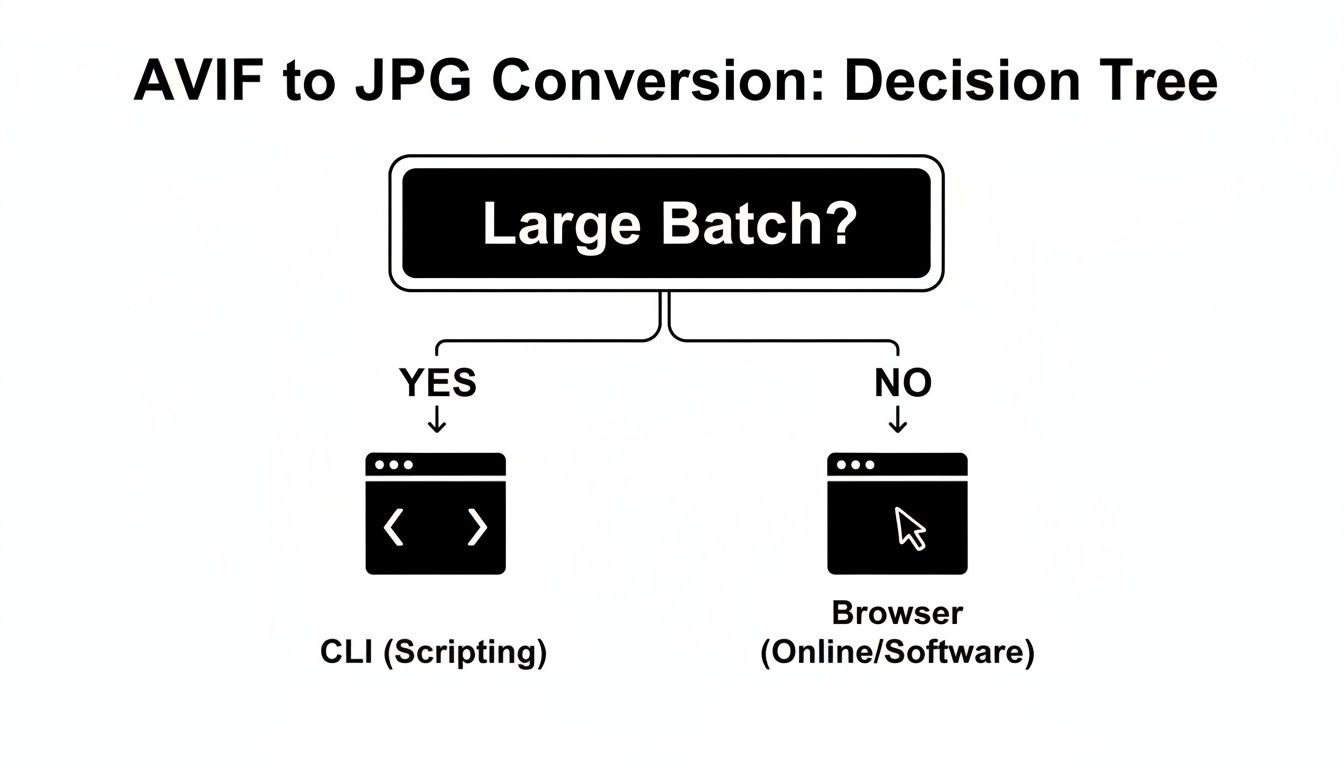
Kao što možete videti, broj fajlova koje treba konvertovati je zaista najveći faktor u odabiru pravog pristupa.
Poređenje Metoda Konverzije
Da bismo to još jasnije prikazali, evo tabele koja razlaže prednosti i nedostatke svake metode o kojoj smo razgovarali.
| Metod | Najbolje Za | Privatnost | Serijska Obrada | Jednostavnost Korišćenja |
|---|---|---|---|---|
| U pregledaču (lokalno) | Brze, privatne konverzije (1-50 datoteka) | Odlično | Dobro | Odlično |
| Online (u oblaku) | Jednokratne, neosetljive datoteke | Loše | Ograničeno | Odlično |
| Desktop aplikacije | Profesionalna upotreba, velike serije | Odlično | Odlično | Dobro |
| Komandna linija (CLI) | Automatizovani radni tokovi, ogromne serije | Odlično | Odlično | Pristojno |
Ova tabela bi trebala da vam pomogne da brzo uskladite svoju specifičnu potrebu sa najboljim mogućim alatom, štedeći vam vreme i štiteći vaše podatke.
Težnja između pogodnosti i izlaganja podacima
Na kraju, da li ćete koristiti online konverter zavisi od vaše specifične situacije i koliko rizika ste spremni da preuzmete. Za neosetljivu datoteku koju jednostavno treba da završite odmah i niste na svom glavnom računaru, online alat može biti savršeno rešenje.
Za bilo koje datoteke koje sadrže osetljive lične ili poslovne informacije, rizik od izlaganja na serveru treće strane retko vredi pogodnosti. U tim slučajevima, alat koji se koristi lokalno, poput ShiftShift ekstenzije, uvek je bolji i sigurniji izbor.
Ova filozofija se ne odnosi samo na slike. Ona se primenjuje na svaku vrstu konverzije datoteka. Na primer, sigurnost dokumenata je jednako kritična. Ako vas zanima, možete videti kako se ova ista načela primenjuju u našem vodiču o najboljem besplatnom PDF konverter softveru.
Pažljivim izborom alata koji koristite, možete brzo završiti konverzije bez ikakvog kompromisa po pitanju privatnosti.
Usavršavanje kvaliteta slika i kontrola obrade serija
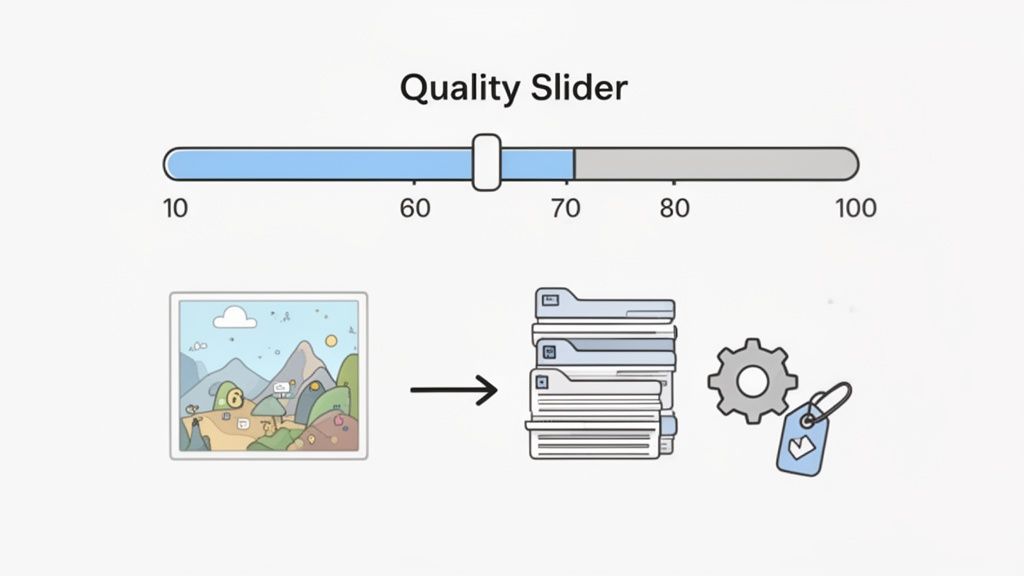
Dobro konvertovanje je više od samo promene ekstenzije datoteke. Da biste zaista izvukli maksimum iz vašeg AVIF to JPG konvertera, morate se upoznati sa dva ključna elementa: kvalitet slike i obrada serija. Ovo su podešavanja koja razdvajaju brzu i površnu konverziju od profesionalnog, efikasnog radnog toka.
Kada konvertujete u JPG, gotovo uvek ćete videti klizač za "kvalitet", obično numerisan od 1 do 100. Uobičajena zabluda je da je ovo procenat originalnog kvaliteta. Nije. To je podešavanje koje govori JPG algoritmu kompresije koliko podataka da odbaci. Viši broj znači manje kompresije i veću datoteku, dok niži broj smanjuje veličinu datoteke, ali može degradirati sliku.
Pronalaženje idealnog kvaliteta
Ne postoji jedinstveni magični broj za kvalitet; to zaista zavisi od fotografije i od onoga za šta je koristite. Ali nakon godina rada sa slikama, razvio sam nekoliko čvrstih pravila.
- 90-95: Ovaj opseg čuvam za fotografije visoke rezolucije gde svaki detalj ima značaj. Datoteke su veće, naravno, ali nećete videti nikakve artefakte kompresije.
- 80-85: Ovo je moj izbor za gotovo sve ostalo—web grafiku, objave na društvenim mrežama, šta god. Dobijate ogroman pad veličine datoteke uz praktično nikakvo uočljivo gubitak kvaliteta. To je savršena ravnoteža.
- Ispod 75: Budite oprezni ovde. Koristite ovaj opseg samo kada je veličina datoteke apsolutni prioritet. Verovatno ćete početi da primećujete blokove i boje, posebno u glatkim područjima poput vedrog plavog neba.
Pro savet za efikasan radni tok: pronađite podešavanje koje funkcioniše za većinu vaših slika, poput 85, i koristite to kao podrazumevano za serijske poslove. Uvek možete kasnije ponovo konvertovati nekoliko specifičnih slika ako im je potrebna posebna obrada.
Efikasno rukovanje datotekama u velikim količinama
Budimo iskreni, konvertovanje slika jednu po jednu je ogromno gubljenje vremena. Ovde obrada serija postaje vaš najbolji prijatelj. Umesto da konvertujete jednu datoteku, možete obraditi celu fasciklu odjednom, primenjujući ista podešavanja na svaku sliku.
Mogućnost obrade AVIF datoteka u serijama potpuno je promenila način na koji kreativni profesionalci rade. Neki alati sada mogu obraditi do 50 datoteka odjednom. Pošto je AVIF postao popularan u pregledačima, potražnja za konverzijom u kreativnim industrijama porasla je za 400%. Ima smisla—istraživanja pokazuju da dok 70% fotografa arhivira svoj rad u AVIF-u, konvertuju 85% svojih konačnih slika u JPG za isporuku klijentima.
Zadržati ili ukloniti metapodatke?
Svaka fotografija koju napravite sadrži skrivene informacije poznate kao EXIF metapodaci. Ovo uključuje stvari poput modela kamere, otvor blende, brzine zatvarača, pa čak i GPS lokacije gde je snimak napravljen. Većina konvertera vam daje izbor da zadržite ove podatke ili ih uklonite.
Evo jednostavnog pregleda kada raditi šta:
- Zadržati metapodatke: Ovo je neophodno za fotografe koji treba da prate svoje postavke ili za bilo koga ko pravi arhivu.
- Ukloniti metapodatke: Ovo toplo preporučujem zbog privatnosti. Uklanjanje podataka o lokaciji pre nego što objavite bilo šta online je jednostavno dobra praksa. Kao mali bonus, takođe malo smanjuje konačnu veličinu datoteke.
Ponekad, samo konvertovanje formata nije dovoljno. Ako se nađete u situaciji da treba da povećate rezoluciju svojih novih JPG-ova bez gubitka kvaliteta, AI Upscaler može biti neprocenjiv alat koji možete imati pri ruci. Udobno korišćenje ovih kontrola je ono što vas vodi od jednostavne promene tipova datoteka do pravog upravljanja vašim slikama sa profesionalnom preciznošću.
Odgovaranje na vaša pitanja o konverziji AVIF u JPG
Kada se bavite novijim formatom poput AVIF-a, prirodno je imati nekoliko pitanja. Radim sa ovim datotekama već neko vreme, i nekoliko uobičajenih problema uvek izgleda da zbunjuje ljude. Dobijanje jasnih odgovora će vam olakšati život i pomoći vam da izaberete pravi AVIF to JPG konverter za ono na čemu radite.
Pogledajmo neka od pitanja koja najčešće čujem.
Da li će konvertovanje iz AVIF-a u JPG smanjiti kvalitet slike?
Da, hoće. Zaista nema načina da se izbegne određeni nivo gubitka kvaliteta. Razmislite o tome ovako: i AVIF i JPG su "gubitnički" formati. To jednostavno znači da odbacuju malo podataka o slici kako bi zadržali male veličine datoteka.
Kada konvertujete AVIF datoteku u JPG, uzimate već kompresovanu sliku i kompresujete je ponovo. Ova dvostruka kompresija neizbežno dovodi do određenog degradiranja.
Trik je u upravljanju tim procesom. Vaša najbolja opcija je da postavite visok nivo kvaliteta za konačni JPG. Prema mom iskustvu, podešavanje između 85 i 95 je idealno. Dobijate kompatibilnu datoteku bez očiglednih artefakata. Ali savet: uvek zadržite svoju originalnu AVIF datoteku. Ne možete povratiti izgubljene podatke.
Da li mogu samo koristiti svoj operativni sistem za konvertovanje datoteka?
Često možete, ali to retko bude najbolji pristup. Novije verzije Windows-a (ako imate AV1 Video Extension) i macOS-a (Sonoma ili novije) mogu otvoriti AVIF datoteke bez problema. Odatle obično možete pronaći opciju "Izvezi kao" ili "Sačuvaj kao" da dobijete JPG.
Dok moderni operativni sistemi sustižu, njihovi ugrađeni alati često nemaju napredne funkcije potrebne za efikasan radni tok. Za bilo šta više od jedne datoteke, posvećen konverter je gotovo uvek bolji izbor.
Problem je u tome što su ovi ugrađeni alati osnovni. Obično ne nude obradu serija, a imate malo ili nimalo kontrole nad konačnim podešavanjima kvaliteta. Za bilo koju vrstu profesionalnog ili visokog volumena rada, brzo ćete primetiti da im nedostaje.
Koji je najbolji besplatni AVIF to JPG konverter?
Iskreno, ne postoji jedinstveni "najbolji" alat. Pravi konverter zaista zavisi od onoga što najviše cenite u svom radnom toku.
Kažem ljudima da razmišljaju o tome na osnovu svog glavnog prioriteta:
- Ako vam je privatnost najvažnija: Idite sa alatom u pregledaču koji radi offline, poput ShiftShift. Sve obrađuje direktno na vašem računaru, tako da vaše slike nikada nisu otpremljene na neki nasumični server.
- Ako vam je potrebna ozbiljna snaga i automatizacija: Ništa ne može da parira alatima komandne linije. ImageMagick je ovde kralj. Ima strmu krivu učenja, ali je neverovatno moćan za skripting i serijske poslove.
- Ako vam je potrebna brza, jednokratna konverzija: Online konverter veb sajt će obaviti posao. Samo budite oprezni i proverite njihovu politiku privatnosti—na kraju krajeva, otpremaćete svoju datoteku na njihov server.
Kada razumete kompromise, možete sa sigurnošću izabrati pravi AVIF to JPG konverter za svaku situaciju.
Spremni da konvertujete datoteke sa neuporedivom brzinom i privatnošću? ShiftShift Extensions paket nudi moćan, u pregledaču baziran konverter slika koji obrađuje AVIF, JPG, WebP i još mnogo toga, sve bez ikakvog otpremanja vaših podataka. Isprobajte ShiftShift danas i preuzmite kontrolu nad svojim radnim tokom.