A Practical Guide on How to Screen Capture a Web Page
Learn how to screen capture a web page with this practical guide. Master browser tools, extensions, and pro tips for perfect full-page captures.
Recommended Extensions
Knowing how to screen capture a web page goes way beyond just hitting the print screen key. You’ve got a few solid methods at your disposal: your OS’s built-in tools are great for quick visible shots, browser developer tools can nail full-page captures, and dedicated extensions bring advanced features to the table. Getting comfortable with these techniques is a must for clear documentation and communication in pretty much any digital workflow.
Why Mastering Web Captures Is a Critical Skill
In a professional setting, a basic screenshot often just doesn't cut it. Picture this: you're a QA engineer trying to report a bug on an infinitely scrolling feed. Or maybe you're a marketer trying to save a competitor's entire landing page for a teardown. A standard capture of only what's on your screen is useless—it’s missing all the important context. This is exactly where knowing the different types of screen captures becomes a total game-changer.
The need for better tools is exploding. The global Website Screenshot Software market, valued around $500 million in 2025, is on track to smash $1.2 billion by 2033. That’s a steady 12% compound annual growth rate, which tells you just how vital high-quality visual documentation has become. You can read more about this market trend to see where things are headed.
Choosing the Right Capture for the Job
Not all screenshots are created equal. The method you pick should depend entirely on what you're trying to accomplish. Getting it right from the start saves a ton of time and avoids the back-and-forth that kills productivity. This is a huge factor in how to improve developer productivity.
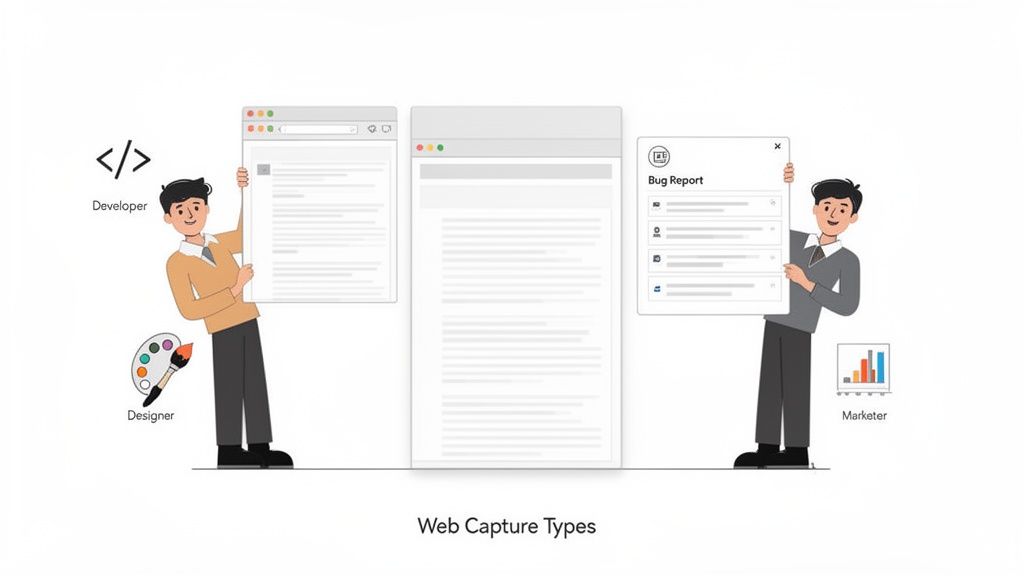
Here’s a quick rundown of the main capture types you'll be using:
- Visible Area Capture: This is your go-to for a quick snapshot of what you can see on your screen right now. It's perfect for sharing a specific UI element or a snippet from an article.
- Full Page Capture: This one grabs everything from the header to the footer, including all the content you'd normally have to scroll to see. It’s essential for detailed bug reports, design archives, and competitive analysis.
- Region Capture: This lets you draw a box around a specific, custom-sized area of the page. It's incredibly handy for isolating a single component, like a navigation bar or a sign-up form, without any of the surrounding clutter.
Mastering these methods transforms a simple screenshot from a static image into a powerful communication tool. It ensures that when you share a visual, your team sees exactly what they need to see, no guesswork required.
Using Your Browser's Built-In Screenshot Tools
You might be surprised to learn that some of the best tools for capturing a web page are already hiding right inside your browser. Buried within the Developer Tools in Chrome, Firefox, and Edge are native screenshot commands that give you pixel-perfect precision—no extensions required. For developers and designers who need clean, high-fidelity captures, this is often the go-to method.
Instead of reaching for another piece of software, you can get started with a simple keyboard shortcut. On most systems, just press F12 or Ctrl+Shift+I (Windows/Linux) / Cmd+Option+I (Mac) to pull up the Developer Tools panel. This is your command center for a whole suite of advanced browser functions.
Accessing the Command Menu
Once you have the Developer Tools open, don't worry about digging through all the tabs and menus. The fastest way to find what you need is by using the command menu, a powerful feature that many people don't even know exists.
To open it, press Ctrl+Shift+P (Windows/Linux) or Cmd+Shift+P (Mac). A handy search bar will pop up, letting you type in commands directly. This is where the real magic happens.
Capturing Different Views
The true power of this method lies in its flexibility. By typing a few words into that search bar, you can perform several different kinds of screenshots with total accuracy.
Here's what you can do:
- Capture full size screenshot: This is the one you want for a complete, top-to-bottom scrolling capture of an entire page. It's perfect for saving long articles or documenting a full landing page design in a single image.
- Capture node screenshot: Need to grab just one specific piece of the page? This is your tool. First, use the 'Elements' tab in the Developer Tools to click on and select any HTML element—like a header, an image gallery, or a single comment. Then, run this command to capture only that highlighted part.
- Capture screenshot: This command does exactly what it sounds like. It grabs a simple screenshot of whatever is currently visible in your browser window, much like your operating system's built-in tool, but all handled within the browser.
This built-in approach is a game-changer for technical work. For instance, you can switch to the device simulator to see how a page looks on an iPhone, then run the screenshot command. This guarantees your capture perfectly reflects the mobile experience, which is invaluable for responsive design checks and bug reports.
Using the browser's native tools gives you a clean, reliable way to screen capture a web page without adding more software to your machine. It offers a level of control that most basic tools just can't match, making it an essential skill for anyone working on the web.
For a deeper dive into different capturing methods, you can also check out this guide on how to take a web page screenshot like a pro. Getting these commands down will help you produce professional-quality captures for any project you're working on.
Taking a Snapshot of the Entire Web Page
Sometimes, grabbing just what you can see on the screen doesn't cut it. To really understand the full picture—whether you're documenting a user journey, archiving a competitor's entire landing page, or flagging a bug that stretches down the page—you need a full scrolling screenshot. This technique stitches everything together, from the navigation bar at the top all the way down to the footer, into a single, comprehensive image.
But capturing these long pages isn't always straightforward. Modern websites are a minefield of tricky elements. You've got sticky headers that follow you as you scroll, images that only pop into view when you get to them (lazy loading), and other dynamic content that can shift the layout mid-capture. Using a basic tool can often result in a messy, incomplete, or broken image, which just adds frustration to your workflow.
Figuring out the right tool for the job is half the battle. This decision tree can help you visualize the best approach based on what you need to capture.
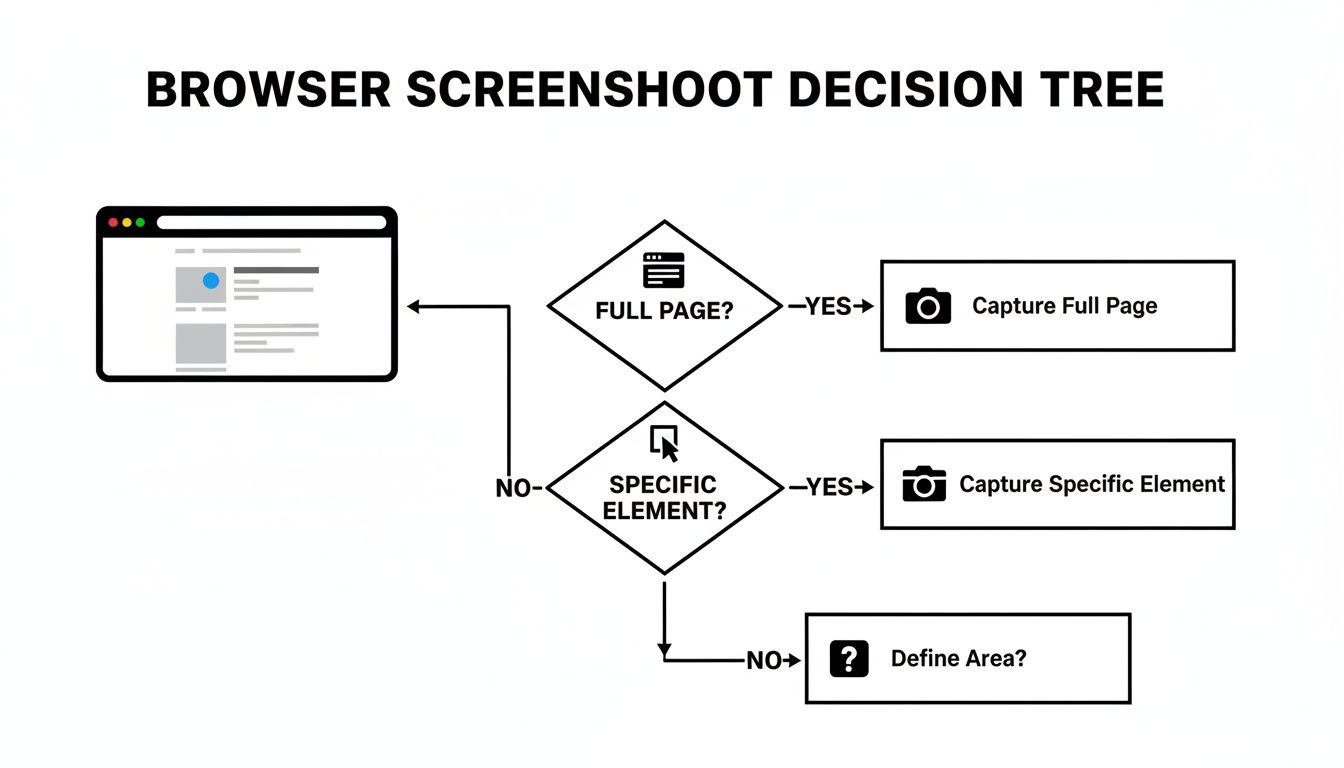
As you can see, the first question to ask is whether you need the whole page or just a piece of it. Answering that simple question will point you toward the most efficient method.
Why You Can’t Live Without Full-Page Captures
Full-page screenshots are more than just long pictures; they're indispensable assets for a ton of different jobs.
- QA engineers use them to show developers the exact context of a UI bug, leaving no room for guesswork.
- Marketers capture entire sales funnels and competitor messaging strategies for deep-dive analysis.
- Designers archive their live work for portfolios, preserving the final product exactly as it was meant to be seen.
The need for robust screenshot tools is exploding. The Full Screen Website Screenshot Software market is on track to reach $1,363.2 million by 2025 and is projected to grow at an impressive 15% CAGR through 2033. This surge is happening because businesses desperately need better ways to handle quality assurance and visual marketing, especially when you consider that Google has something like 50 billion web pages indexed. That's a lot of content to document and analyze. You can dig into the specifics by checking out these market research findings.
Comparing Web Page Capture Methods
So, you need to capture a full web page. What are your options? Each method comes with its own set of pros and cons, and the best choice really depends on what you're trying to do.
This table breaks down the most common approaches, from built-in browser tools to specialized extensions, so you can quickly see which one fits your needs.
| Method | Capture Types | Best For | Limitations |
|---|---|---|---|
| Browser DevTools | Full Page, Node, Visible | Developers who need precise, extension-free captures without leaving the browser. | Can feel clunky for non-technical users and often chokes on pages with heavy animations or dynamic content. |
| OS Snipping Tools | Visible, Region | Quick, simple grabs of whatever is currently on your screen. | Totally useless for capturing anything that requires scrolling; lacks any web-specific features. |
| Browser Extensions | Full Page, Visible, Region | Fast, flexible captures with bonus features like annotations, easy sharing, and cloud storage. | Quality and privacy can be hit-or-miss; some extensions upload your data to their servers. |
Ultimately, picking the right tool ensures your screenshot is clean, accurate, and complete.
My advice? The best method often comes down to the complexity of the website itself. For a straightforward blog post, a browser's built-in tool is usually fine. But for a dynamic e-commerce site loaded with interactive elements, a dedicated browser extension is almost always the more reliable bet.
Don't be afraid to experiment with both native tools and a few well-regarded extensions. Finding what works best for your specific workflow will save you a ton of headaches, whether you're documenting bugs, archiving designs, or just keeping an eye on the competition.
Streamlining Captures with Browser Extensions
While the built-in browser tools are surprisingly capable, let's be honest—they can feel a bit slow and clumsy for daily use. When your workflow depends on speed and flexibility, a dedicated browser extension is the way to go. Extensions live right inside your browser, turning a multi-step process into a one-click action while adding features that native tools just don't offer.
For anyone who needs to screen capture a web page without breaking their stride, an integrated solution like ShiftShift Extensions is a real game-changer. It’s built for people who value efficiency and privacy, bundling several capture methods into a single, lightning-fast interface.
Instant Captures with the Command Palette
The heart of the ShiftShift ecosystem is its Command Palette. Just double-tap the Shift key, and it pops right up. This central hub puts every feature, including screenshots, at your fingertips—no need to even touch your mouse.
Instead of hunting for an icon in your toolbar, you just bring up the palette and start typing. This keyboard-first approach is a massive time-saver, especially for repetitive tasks like documenting UI bugs or grabbing design inspiration.
Here’s how it makes capturing a page almost effortless:
- Full Page Capture: Type
screenshot pageand press Enter. The extension takes over, automatically scrolling and stitching the entire page into one seamless image. It’s even smart enough to handle tricky elements like sticky headers and content that lazy-loads as you scroll. - Visible Area Capture: Use the command
screenshot visibleto instantly grab everything you can see on your screen. This is my go-to for firing off a quick snapshot to a colleague in Slack or dropping it into an email. - Region Selection: The
screenshot selectcommand turns your cursor into a crosshair, letting you click and drag over the exact area you want. It's perfect for isolating a specific component—like an ad creative or a user comment—without any distracting clutter.
This method completely changes how you screen capture a web page by cutting out all the extra clicks and context switching that slow you down.
One of the biggest wins here is the privacy-first design. All the image processing happens locally, right inside your browser. Nothing ever gets uploaded to a server, which means your captures and the data on your pages stay completely private and secure. The tool even works entirely offline.
Choosing Your Format and Managing Files
After you take a screenshot, you're not locked into a single file type. The extension immediately gives you the choice to save your capture as either a PNG or a JPEG.
This is more important than it sounds. That flexibility lets you balance image quality with file size—a constant tug-of-war when sharing visuals. A PNG is perfect for keeping text and UI elements crisp and clear, while a JPEG is often better for compressing photographic content.
Once captured, your screenshot opens in a new tab where you can quickly save it, copy it to your clipboard, or just close the tab and try again. This self-contained workflow helps you stay in the zone. If you're looking for a powerful tool without the big price tag, exploring a free Snagit alternative like this one can really boost your productivity.
Think about a developer's workflow for a moment. They spot a visual bug, pop open the Command Palette to capture the specific element, and then maybe use another ShiftShift tool to compare the broken CSS with the correct code—all without ever leaving their browser tab. It’s this kind of tight integration that makes a dedicated extension an essential part of a modern toolkit.
Advanced Techniques for Flawless Screenshots
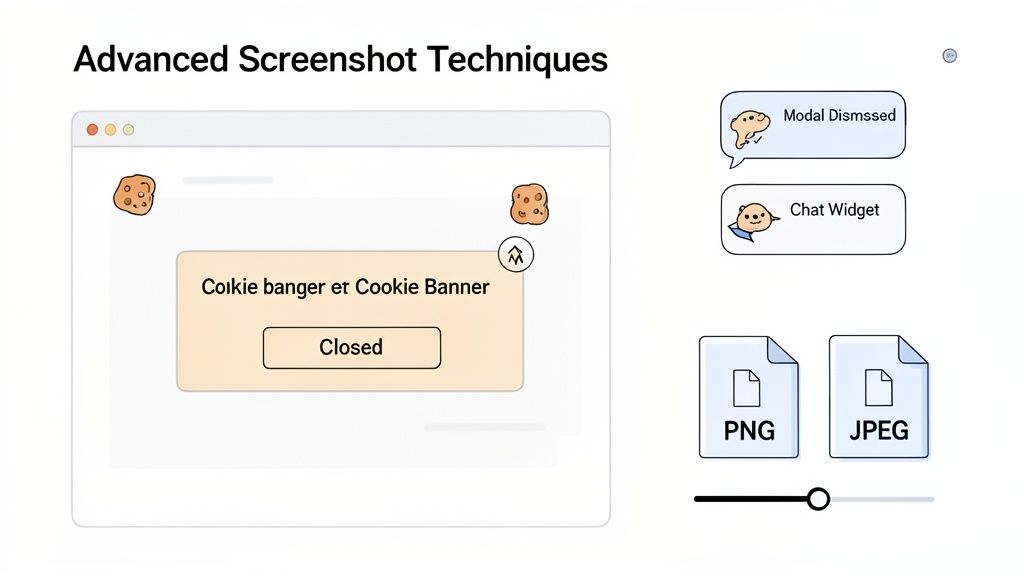
You've lined up the perfect shot for a report or presentation, but a cookie banner or a chat widget photobombs the screen. We've all been there. Modern websites are interactive, which is great for users but can be a real headache when you need a clean, professional-looking screen capture. Getting that perfect shot often means doing a little prep work before you hit the capture button.
Luckily, you don't need fancy editing software to get rid of these distractions. Your browser's built-in Developer Tools are your best friend here. Just right-click the element you want to remove—say, an annoying pop-up modal—and select "Inspect." Then, in the Elements panel that appears, right-click the highlighted HTML code and choose "Delete element." Poof! It's gone, giving you a clear view for a perfect, unobstructed screenshot.
Handling Dynamic and Authenticated Content
Capturing pages with dynamic content or those hidden behind a login wall introduces a whole other set of challenges. Many screenshot tools just can't handle them properly, but with the right approach, you can still get what you need.
- Parallax Scrolling: I’ve seen many full-page screenshot tools get completely thrown off by parallax effects, where the background moves at a different speed than the foreground. The result is usually a distorted, stitched-together mess. The most reliable fix is to capture smaller, visible sections one at a time.
- CSS Animations: Need to show an animation in action? A static screenshot won't cut it. Your best bet is to use your operating system's screen recording feature to grab a short video or even a GIF. It's far more effective for demonstrating motion.
- Content Behind Logins: If you need to capture a page that requires a login, just make sure you’re logged into the site in your current browser session. Most extensions and developer tools capture the page exactly as you see it, so they’ll respect your authenticated state.
A few seconds of prep can save you minutes of tedious editing later. Zapping a chat widget with the developer console takes five seconds, while trying to Photoshop it out cleanly from a finished image can be a real pain.
Choosing the Right Image Format
Finally, don't overlook the file format. This isn't just a minor technical detail; choosing between PNG and JPEG has a direct impact on the quality and file size of your final image.
As a rule of thumb, PNG is the way to go for screenshots heavy with UI elements, text, and sharp lines. Its lossless compression keeps everything looking crisp and clear. On the other hand, if the page is mostly photographic content, JPEG is a better choice. Its compression algorithm is designed for photos and can drastically shrink the file size without a noticeable drop in visual quality. For a deeper dive, check out our guide on choosing the best image format for the web.
High-quality screen captures are more important than ever, driving everything from QA testing to design mockups. It’s a fast-paced world—users form an impression of a website in just 0.5 seconds, which makes quick visual feedback absolutely critical. This need is even reflected in developer workflows, where datasets of website screenshots are used for analysis and training.
Frequently Asked Questions About Web Page Captures
Even the most straightforward tools can run into a few snags when you're trying to capture a webpage. From tricky infinite scroll pages to picking the right file format, these are the questions I hear most often.
Getting a clean, complete screenshot isn't always as simple as it looks, especially with how dynamic modern websites are. Let's walk through some of the most common challenges and how to solve them.
How Do I Capture a Page with Infinite Scroll?
Ah, the dreaded infinite scroll. This is a classic problem because the page only loads new content when you scroll down. If you try a standard full-page capture, it will only grab what’s currently loaded, leaving you with an incomplete image.
The most direct way to handle this is to do the scrolling yourself. Just keep scrolling down the page until every last bit of content you need is visible. Once it's all loaded, you can pop open your browser's developer tools and use the "Capture full size screenshot" command. This tells the browser to snap a picture of everything it has rendered, top to bottom.
Of course, that's a lot of manual work. A much easier route is to use a browser extension built for this exact scenario. Tools like ShiftShift Extensions are smart enough to handle dynamic content by automatically scrolling the page for you, making sure everything loads before it takes the final, complete screenshot.
What Is the Best Format to Save a Screenshot?
The best format really boils down to what’s on the page you're capturing. It’s a classic trade-off between image quality and file size, and knowing which to choose makes a huge difference.
Here’s my go-to guide:
PNG (Portable Network Graphics): I always use PNG for pages heavy on text, user interface elements, logos, or anything with sharp, clean lines. PNGs use lossless compression, meaning they keep every single pixel perfectly intact. This keeps your text and graphics looking incredibly crisp.
JPEG (Joint Photographic Experts Group): When a page is mostly photographs or has complex gradients, JPEG is the winner. It uses lossy compression to dramatically shrink the file size. For photo-heavy pages where you don't need pixel-perfect precision, this is the ideal choice.
My rule of thumb is pretty simple: If it’s mostly UI and text, go with PNG for clarity. If it’s mainly photos, choose JPEG for its smaller file size. This little bit of know-how ensures your captures always look professional.
Can I Capture a Specific Part of a Page?
Absolutely, and honestly, it's often the better way to go. Capturing just a specific region is perfect for creating focused documentation or sharing a single element without all the surrounding clutter.
Most good browser extensions have a "Select area" or "Region capture" feature. This usually turns your cursor into a crosshair, letting you click and drag a box around the exact part of the page you want to save.
For more technical work, you can even use your browser's developer tools to select a specific HTML element—what developers call a "node"—and then take a screenshot of just that piece. It's an incredibly handy trick for designers and developers.
Are Screenshot Browser Extensions Safe?
That's a great question. Any extension you install technically has some level of access to your browser content, so it’s smart to be cautious. The key is to pick a tool from a developer who puts privacy first. For example, if your work involves documenting online ads, you might want to learn about ad screenshots or tear sheets and how to capture them for digital ad campaigns to understand specific security needs.
My biggest red flag is any extension that automatically uploads your captures to an external server without your explicit permission. A truly safe tool does all its processing locally, right inside your browser. ShiftShift Extensions, for instance, was built with a privacy-first mindset. It works entirely offline, which guarantees your data and screenshots stay on your machine and remain completely private.
Ready to stop juggling tools and streamline your workflow? ShiftShift Extensions rolls a powerful screenshot utility and dozens of other features into one elegant command palette. Download it from the Chrome Web Store and see what you've been missing.