Your Guide to the Best WebP to PNG Converter
Find the best WebP to PNG converter for any workflow. Learn how to convert images in your browser, with CLI tools, and desktop apps for perfect results.
Recommended Extensions
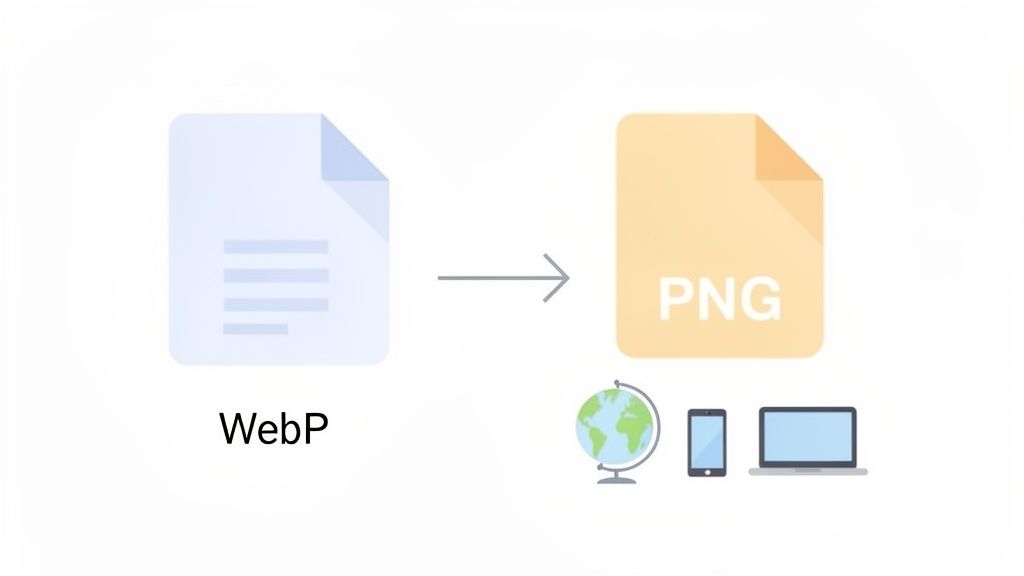
A good WebP to PNG converter is a tool I keep bookmarked and ready to go. It's an absolute necessity for anyone working with images online, acting as the crucial link between modern web formats and the files we actually need to use day-to-day. WebP is a godsend for site speed, no doubt, but PNG's universal compatibility and lossless quality are still king for just about everything else.
Why Do You Even Need to Convert WebP to PNG?
It sounds a bit backward, right? Google created WebP to be a lighter, faster format for the web, and it's practically everywhere now. So why would you ever want to convert from it?
The answer is simple: an image’s life doesn't stop once you right-click and save it. The need for a webp to png converter pops up the second that image needs to do anything outside of a modern web browser.
While WebP's compression is impressive, PNG is still the undisputed champion for compatibility and perfect, lossless quality—especially when you need a transparent background. This is a big deal for a lot of people:
- Designers: I can't tell you how many times older versions of Adobe Photoshop or Illustrator have simply refused to open a WebP file. Converting it to PNG is the first step before any real editing can begin.
- Content Creators: Many social media schedulers, email platforms, and even presentation tools are picky about what you upload. They'll often flat-out reject WebP, making PNG the only reliable option.
- Developers: Working with legacy systems or older internal apps? There’s a good chance they were built long before WebP was a thing. PNG is the safe, backward-compatible choice to make sure your assets actually show up.
The Compatibility Gap Is Real
Despite its takeover online, WebP isn't supported everywhere. As of 2025, it boasts an incredible 96.5% browser support—a huge leap from 92.8% back in 2023. This is because it can slash file sizes by about 30% compared to JPG without any noticeable quality drop. It's no wonder that 68% of the top 10,000 websites are now serving images in WebP.
But that still leaves a gap, especially in older browsers and, more importantly, in the vast world of non-browser software.
The modern web might be all-in on WebP, but the offline world of desktop apps and third-party platforms often tells a very different story. That’s precisely why flexible conversion tools remain so essential. If you want to get into the weeds, you can explore our deep dive on choosing the best image format for the web.
Real-World Scenarios Where PNG Saves the Day
This isn't just a theoretical problem; it’s a practical one that crops up all the time. Think about e-commerce. A common task is downloading product images from platforms like AliExpress, which almost always serve them as WebP to keep their pages loading fast.
But what happens next? You need to use those images in marketing emails, product catalogs, or on other sales channels that don't support the format. The only way forward is to convert them to PNG first.
Key Takeaway: Think of it this way: WebP is for optimizing image delivery on the web, but PNG is for ensuring image usability everywhere else. A solid converter is the bridge you need to make sure your images work wherever you need them.
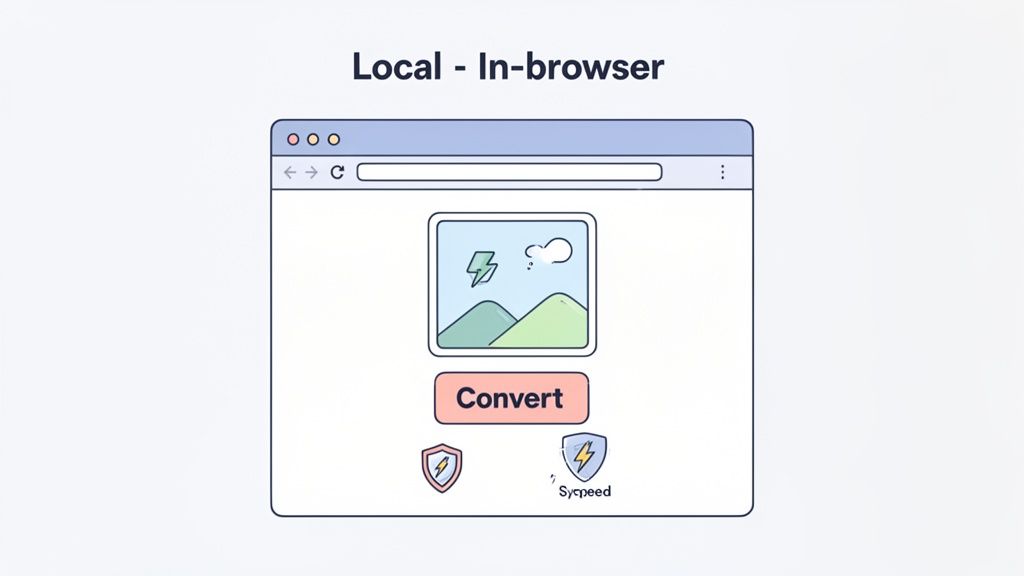
Instant Conversions with In-Browser Tools
Let's face it, when you need a quick webp to png converter, uploading your files to some random website is a drag. It’s slow, and you’re left wondering who now has a copy of your images. For anyone who values their time and privacy, the best solution runs right inside your browser, completely offline.
This is where in-browser tools, particularly those in the ShiftShift Extensions ecosystem, really shine. They do all the heavy lifting on your machine, which means your files never touch a third-party server. It's a game-changer for developers running quick tests, designers making fast tweaks, or anyone prepping assets without wanting to risk their security.
The entire process is built for pure efficiency. You get to skip the upload/download queues and sidestep the privacy headaches that come with typical online converters.
A Workflow Built for Speed
Picture this: you've just pulled a dozen WebP images from a client's website and need them in PNG format for a presentation, like, yesterday. The old way involved opening a new tab, hunting for a converter, and then uploading each file one by one. An in-browser command palette completely changes that.
With a tool like ShiftShift, a quick hotkey (Cmd+Shift+P on Mac or Ctrl+Shift+P on Windows) brings up a command palette. Just type "convert," pick the image converter, and then drag all your WebP files right into the window. The conversion to PNG happens instantly. No waiting.
What I love about this workflow is how neatly it fits into other tasks. Maybe after converting those images, you need to document the final design. Instead of switching apps, you can stay right where you are. In fact, knowing how to take a full page screenshot with the same toolset can seriously speed up your entire content creation process.
The real magic of an in-browser converter is its immediacy. No server processing, no queues, no data transfer. It’s the closest you can get to a native desktop app without ever leaving your browser.
Why Privacy-First Conversion Matters
Every time you upload a file to a free online tool, you’re gambling with your data. That’s a risk you just can’t take with sensitive client work, proprietary designs, or personal photos. By design, in-browser tools make this a non-issue.
Here’s what that local-first approach gives you in practice:
- Total Security: Your files are processed on your machine and stay on your machine. There's zero risk of them being stored, analyzed, or exposed on some unknown server.
- Offline Capability: Once the extension is installed, it works without an internet connection. This is a lifesaver when you're on the go or stuck with spotty Wi-Fi.
- No File Size Limits: Server-based converters often choke on large files or cap how many you can convert. Local tools don't have these arbitrary limits, so you can process huge, high-res images without a problem.
While converting WebP to PNG is the main goal here, sometimes you need to bundle images into a document. For that, a good WebP to PDF converter can be incredibly useful, especially for creating archives or reports. It just goes to show how important it is to have versatile and secure tools in your back pocket.
Ultimately, choosing an in-browser webp to png converter is about reclaiming control. You get the snappy feel of a web app with the robust security of a desktop program, creating a workflow that's both powerful and incredibly efficient.
Comparing WebP to PNG Conversion Methods
With so many ways to convert WebP to PNG, it helps to see how they stack up. This table breaks down the most common methods so you can pick the right tool for your specific needs, whether you prioritize speed, privacy, or batch processing power.
| Method | Best For | Speed | Privacy | Batch Processing |
|---|---|---|---|---|
| In-Browser Tools | Quick, secure, one-off conversions without leaving the browser. | Instant | Excellent | Limited to drag-and-drop |
| Desktop Apps | Professional designers needing advanced editing and batch workflows. | Fast | Excellent | Excellent |
| Command Line | Developers and power users who need to automate large batches. | Very Fast | Excellent | Superior |
| Online Converters | Casual users converting a few non-sensitive files. | Slow (Upload/Download) | Poor | Varies |
| Browser "Save As" | Saving a single WebP image from a webpage as PNG/JPG. | Fast | Good | None |
Each method has its place. For day-to-day tasks where speed and security are paramount, an in-browser tool is tough to beat. For heavy-duty, repetitive tasks, the command line or a desktop application will be your best friend.
Automating Conversions with the Command Line
For developers, QA engineers, or anyone wrangling a huge pile of image assets, manually clicking and dragging files just doesn't scale. When you need to get things done efficiently, the command line is your best friend. Using a command-line interface (CLI) for a webp to png converter lets you automate repetitive work, bake conversions into build scripts, and process thousands of images without ever touching a mouse.
This approach turns image conversion from a tedious chore into a seamless, automated step in your workflow. Instead of dealing with files one by one, you can write simple scripts to handle entire directories. You'll save a ton of time and cut down on the chances of human error. It’s the standard method for professionals who demand precision, speed, and repeatability.
Getting Started with ImageMagick
One of the most powerful and popular CLI tools for this job is ImageMagick. It’s a free, open-source software suite that can handle a mind-boggling number of image processing tasks, including, of course, converting WebP to PNG. First, you'll need to get it installed, which is usually a quick process with a package manager like Homebrew on macOS or apt-get on Debian-based Linux systems.
Once it's ready to go, converting a single file is incredibly simple.
convert input-image.webp output-image.png
That’s it. This command tells ImageMagick to take input-image.webp and save the result as output-image.png. The tool is smart enough to figure out the format change just from the file extensions. It’s clean, direct, and perfect for a quick conversion right from your terminal.
But the real magic happens when you need to handle files in bulk. That’s where you move from simple commands to powerful scripts.
Creating a Batch Conversion Script
Let’s imagine a real-world scenario. You're a front-end dev, and you’ve just been handed a folder with hundreds of WebP product images for a new e-commerce build. The problem? The CMS you're working with only accepts PNGs. Doing this by hand would be a nightmare. Instead, you can use a simple loop in a shell script to automate the entire job.
Here’s a practical script that will convert every .webp file in a directory to .png:
#!/bin/bash
A simple script to batch convert WebP to PNG in the current directory
for file in *.webp; do
convert "$file" "${file%.webp}.png"
done
echo "Conversion complete!"
So, what's happening here?
for file in *.webp; dokicks off a loop that goes through every single file ending with the.webpextension in the current folder.convert "$file" "${file%.webp}.png"is the core command. For each file, it calls ImageMagick. The${file%.webp}part is a nifty shell trick that strips the.webpextension from the original filename, and then we just tack on.pngto create the new name.donefinishes the loop, and the script prints a helpful confirmation message.
Just save this script as a file (like convert-all.sh), run it, and you can process an entire asset library in seconds. This is the kind of automation that professional workflows are built on.
Leveraging FFmpeg for Conversions
While ImageMagick is a master of still images, another powerhouse tool you might already have on your machine is FFmpeg. It's famous for handling video and audio, but it’s also surprisingly great at image conversion and makes a fantastic webp to png converter.
The syntax is a little different but just as easy. For a single file, the command is:
ffmpeg -i input.webp output.png
The -i flag just tells FFmpeg what the input file is. Like ImageMagick, it figures out the output format you want from the filename extension. It's a great option if you're already in a multimedia-heavy workflow and prefer sticking to one tool for all your media manipulation.
Pro Tip: When you're automating, always work on copies of your original files. A tiny typo in a script could accidentally overwrite or delete your source images. Play it safe by making a backup or having your script save the new files to a completely separate directory.
Integrating Conversions into Your Build Process
The ultimate goal of automation is to make these conversions an invisible step in a larger process. For web developers, this often means plugging image processing directly into the project's build script. Whether you're using npm, Gulp, or another task runner, you can add a command to handle your WebP assets automatically during the build.
For example, you could add a script right into your package.json file:
"scripts": {
"build:images": "for file in assets/images/*.webp; do convert "$file" "dist/images/${file%.webp}.png"; done",
"build": "npm run build:images && other-build-steps"
}
With a setup like this, just running npm run build will automatically find all the WebP images, convert them to PNG, and drop them into the final distribution folder. This guarantees your production assets are always in the right format without you having to think about it, making your development cycle faster and much more reliable.
Achieving Precision with Desktop Software
Sometimes, you need more than just a quick conversion. When pixel-perfect control is the name of the game, it's time to bring in the heavy hitters: professional desktop software. For creative work, managing brand assets, or any high-stakes project, tools like Adobe Photoshop or GIMP are simply non-negotiable.
This is where you move beyond just changing a file format and start managing a creative asset. It allows you to get under the hood, make granular adjustments, and control every single aspect of the final PNG. You're ensuring it meets exacting quality standards before you ever hit "Export."
For designers, photographers, and anyone who can't afford surprises, this hands-on approach is about maintaining creative fidelity from start to finish.
Navigating WebP in Professional Creative Suites
Getting a WebP file to open in a program like Photoshop used to be a real headache. For years, you had to hunt down and install a third-party plugin just to load the file.
Thankfully, those days are mostly behind us. Modern versions of Adobe Creative Cloud have integrated native WebP support, so you can open them just like a JPEG or TIFF. But if you're working with older software, you might still need a workaround.
- For GIMP: The open-source powerhouse has solid, built-in WebP support. You can open, edit, and export WebP files right out of the box, making it an excellent free option for this workflow.
- For Older Photoshop: If you're on a version before Photoshop 23.2, you’ll need a plugin. Google's official WebPShop plugin is the standard choice and will get you up and running with full support.
Once the image is loaded, you have the entire suite of editing tools at your fingertips before you even think about converting. This is where desktop software really shines.
A Designer's Workflow Example
Let's walk through a common scenario. A designer gets a company logo, but the only version they have is a WebP file. Their task is to make a minor color correction and export it as a transparent PNG for the company website, presentations, and print materials.
Here’s how they'd tackle it:
- Open and Prepare: The designer opens the WebP logo directly in the latest version of Photoshop. First things first, they'll verify the image mode is set to RGB and check the resolution to make sure it's high enough for all its intended uses.
- Edit with Precision: Using adjustment layers, they carefully tweak the color balance to match the official brand hex codes. This is non-destructive editing—a huge advantage of professional software.
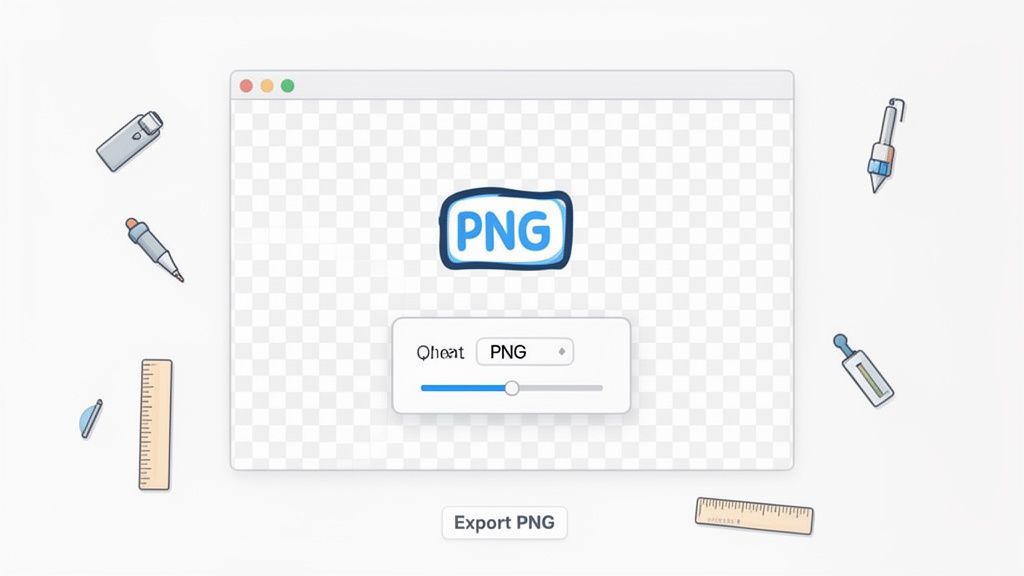
- Export with Control: Instead of just "Save As," a pro uses the File > Export > Export As... dialog. This opens a powerful panel that offers complete control over the final PNG settings.
This export panel is where the magic happens. Here, the designer can confirm Transparency is checked, guaranteeing the logo has a clean, see-through background. They can also preview the final file size and double-check the dimensions, all without guesswork.
This meticulous process eliminates errors and produces a perfect, brand-compliant asset every time. For those who need to document their process, knowing how to take screenshots on laptops is a fantastic way to capture these settings for a style guide.
Using a dedicated desktop
webp to png converterworkflow isn't about speed; it's about certainty. You are in complete command of the final output, which is crucial when quality and brand consistency are on the line.
While 96.5% of browsers now support WebP, professional creative tools and legacy systems still depend on PNG for its universal acceptance, especially for images that need transparency. The demand for reliable conversion is huge—it’s estimated to cut file prep time for professionals by as much as 70% in some workflows. You can learn more about how Adobe empowers image conversions for today's creative needs.
Getting the Quality and Transparency Just Right
Converting a file is easy. But getting a good conversion—one that's crisp, clean, and professional—is a whole different ball game. The real skill in using a webp to png converter isn't just clicking a button; it's understanding the nuances of image quality and transparency. This is what separates a quick, sloppy job from a pro-grade asset you can use anywhere.
This becomes especially critical when you're working with logos, icons, or any graphic that absolutely must have a transparent background. The magic behind this is the alpha channel, which is the part of the image file that tells pixels how see-through they should be. A high-quality WebP to PNG conversion has to preserve this channel perfectly, otherwise you'll end up with those dreaded white boxes or jagged edges around your graphics.
Know Your Source WebP File
Before you even think about converting, take a second to figure out what kind of WebP file you're starting with. WebP comes in two main flavors, and the one you have will directly impact the quality of your final PNG.
- Lossless WebP: Think of this like a ZIP file for your image. It shrinks the file size without throwing away a single pixel of data. When you convert a lossless WebP to PNG, you should get a perfect, pixel-for-pixel copy with zero quality loss.
- Lossy WebP: This is more like a JPEG. It cleverly gets rid of some image data to make the file much smaller, which is great for web speed. However, any compression artifacts—like a bit of blurriness or weird color bands—are permanently baked into the image.
Converting a lossy WebP won't degrade it further, but it can't magically invent the data that was already thrown out. The PNG you get will just be a perfect, uncompressed copy of that already-compressed source file.
My Two Cents: Always, always start with the best quality source file you can get your hands on. If a lossless WebP is an option, use it. You can always go from high quality to low, but you can never add quality back that's already been lost to compression.
Why the Alpha Channel is Everything
The alpha channel is the hero that makes transparent backgrounds possible, and it’s a big reason why PNG is still so essential for designers and developers. While modern WebP files handle transparency just fine, making sure that information survives the conversion process is what really matters.
Imagine you're converting your company's logo. If the webp to png converter you're using botches the alpha channel, you could end up with your beautiful logo stuck on a solid white background. That makes it totally useless for placing over colored sections on a website, in a slide deck, or in a video.
The good news is that most solid converters—from in-browser tools in the ShiftShift ecosystem to command-line workhorses—handle alpha channels automatically. The whole point is for the process to be seamless, perfectly preserving every transparent pixel from the original file.
Fixing Common Conversion Headaches
Even with the best tools, things can sometimes go sideways. One common issue that trips people up is a subtle but noticeable shift in colors after converting. This is almost always caused by a mismatch in color profiles.
A color profile is a small piece of data that tells devices how to display colors accurately. If your source WebP has a specific profile (like sRGB or Adobe RGB) and your converter just ignores it, the final PNG might look a little washed out or way too vibrant. Professional tools like Photoshop give you full control over this, but it's something to keep in mind even with simpler online tools.
WebP often beats PNG on file size, compressing files 25-30% smaller in lossless mode, but PNG’s rock-solid support for alpha transparency and perfect quality keeps it indispensable. As WebP becomes more common, the need for a good webp to png converter has shot up. Tools like ShiftShift Extensions are a fantastic browser-based option, giving designers offline-capable batch processing to keep their workflow humming. You can dive deeper into the WebP vs PNG comparison on webhelpagency.com.
Here’s a quick mental checklist to run through if your conversions are looking off:
- Check the Source: Is the original WebP file already blurry or pixelated? Zoom in and inspect it for compression artifacts.
- Confirm Transparency: Are you sure the original WebP had a transparent background? Sometimes it's just a solid white one that looks transparent on a white page.
- Try Another Tool: If one converter is giving you grief, switch it up. Different tools use different libraries, and another one might handle your specific file better.
- Watch for Color Shifts: If the colors look wrong, you're likely wrestling with a color profile issue. This is where a more advanced desktop app can be a lifesaver.
By paying attention to these details—your source quality, the alpha channel, and potential color issues—you can make sure every conversion comes out clean, accurate, and ready to go. It’s that little bit of extra care that makes your work look truly professional.
How to Pick the Right Converter for Your Workflow
With so many tools out there, finding the best WebP to PNG converter really just comes down to your specific needs. What works for a quick, one-off job won't be the right fit for a complex automated workflow. The best tool is simply the one that matches the task at hand.
Think about it: a developer writing a script to process a folder of 500 images has completely different priorities than a designer who needs to perfectly preserve the alpha transparency on a single logo. One needs power and automation; the other needs precision and fine-tuned control.
This decision tree can give you a good starting point, helping you think about how the source WebP file itself should guide your conversion process.
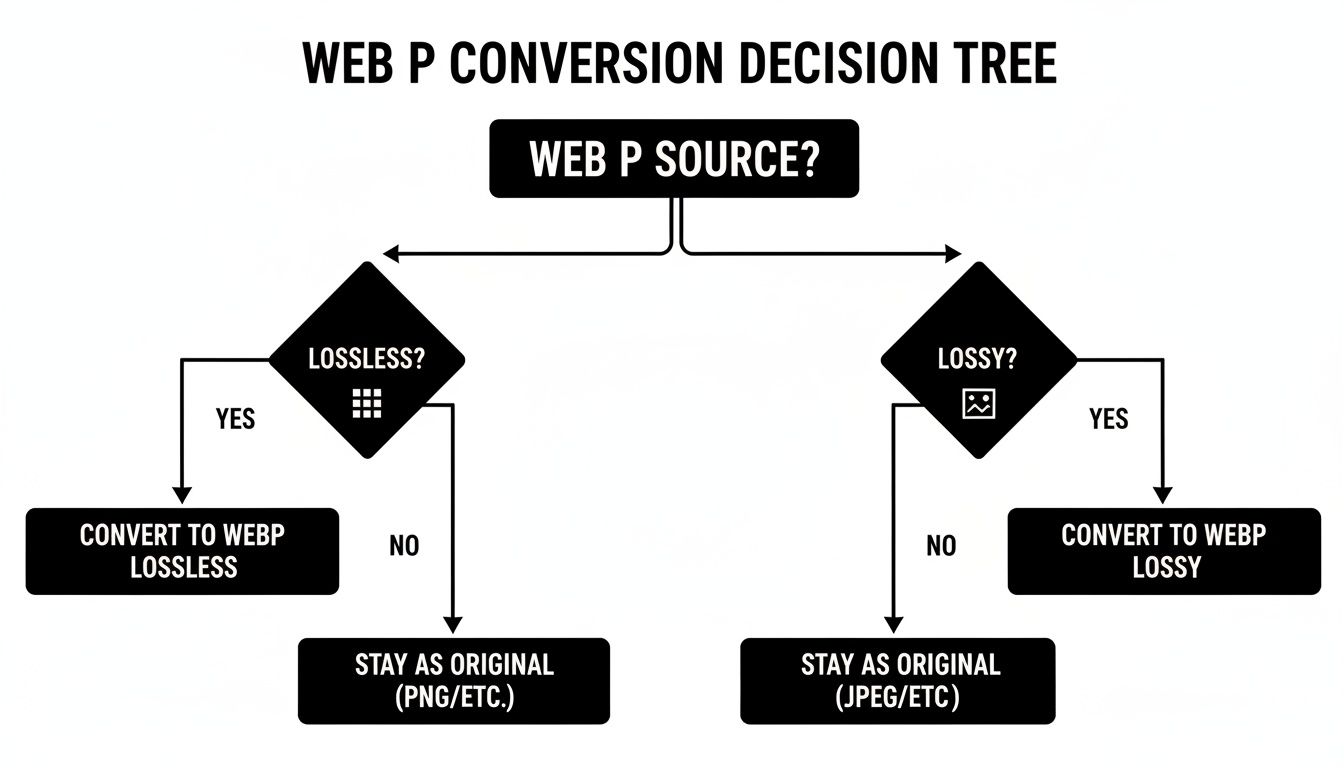
As the chart shows, knowing whether your original WebP is lossy or lossless is key to maintaining the highest possible quality after you convert it.
Matching the Tool to Your Goal
Let's cut through the noise and figure out which method is right for you. I've found it helpful to think about the primary goal of the conversion.
- You need it done fast and privately: An in-browser tool like ShiftShift is your best bet. It’s perfect when you need to convert a sensitive file quickly without uploading it to a server.
- You need to convert a ton of files: This is where the command line shines. Tools like ImageMagick are built for this, letting you batch-process entire directories with a simple script.
- You need absolute creative control: Fire up your desktop software. For anything that requires edits, color profile checks, or specific export settings, nothing beats the precision of Adobe Photoshop or GIMP.
In my experience, a smart workflow isn't about sticking to just one format. It’s about building a flexible toolkit that lets you switch between formats without a headache. When you pick the right WebP to PNG converter for the specific job, you cut out the friction and keep your projects on track.
Common Questions About WebP to PNG Conversion
Jumping between image formats can bring up some tricky questions. When you're trying to use a webp to png converter, you want to make sure you're doing it right to avoid compatibility headaches and get the best results. Here are the answers to the questions I hear most often.
Will Converting from WebP to PNG Degrade My Image Quality?
This is a big one, and the short answer is: it depends on the original WebP file.
If your WebP was saved with lossless compression, then no, you won't lose a single bit of quality. The conversion to PNG will be perfect. It’s like pouring water from one glass to another—nothing is lost. Both formats are lossless, so the pixel data remains identical.
On the other hand, if the WebP used lossy compression (much like a JPEG), any compression artifacts it already has will come along for the ride. The conversion to PNG won't make it worse, but it can't magically restore the quality that was lost to make the original WebP file smaller.
Why Is My New PNG File So Much Bigger Than the WebP?
Don't be alarmed—this is completely normal. The WebP format was engineered by Google to have much more efficient compression than the older PNG standard. In fact, a lossless WebP is typically 25-30% smaller than the exact same image saved as a PNG.
When you convert that WebP back to a PNG, you're essentially moving the image data into a less compact "container." That increase in file size is the trade-off for PNG's broader, near-universal compatibility with software that hasn't caught up with WebP yet.
How Can I Make Sure the Transparency Is Preserved?
Keeping the transparent background is often the whole point of using a webp to png converter. Fortunately, most modern tools are smart enough to handle this automatically. Whether you're using a browser extension or a command-line tool, they're built to preserve what's known as the alpha channel.
The alpha channel is the part of an image file that tells each pixel how transparent it should be. A successful conversion copies this data perfectly, so your transparent backgrounds don't suddenly turn solid white or black.
If you’re working with desktop software like Photoshop or GIMP, you have more direct control. When saving your file, look for the "Export As..." or "Save for Web" options. These dialogs usually have a specific checkbox for "Transparency"—make sure it’s checked. This is a much safer route than a simple "Save As," which might not handle the transparency settings correctly.
Ready to convert images instantly and securely right in your browser? The ShiftShift Extensions ecosystem offers a powerful, privacy-first image converter that handles WebP, PNG, JPG, and more without ever uploading your files. Get started at https://shiftshift.app.