Windows 7 How To Take A Screenshot A Practical Guide
Learn Windows 7 how to take a screenshot with our guide on the Print Screen key, Snipping Tool, and other powerful screen capture techniques.
Recommended Extensions
Learning how to take a screenshot in Windows 7 is a fundamental skill, and the good news is, you don’t need any fancy software to get started. The tools are already built right into the operating system.
For a quick, no-fuss capture of your entire screen, just press the Print Screen (PrtScn) key. If you only need to grab a picture of the specific window you're working in, use the Alt + Print Screen keyboard shortcut instead. Both of these actions copy the image directly to your clipboard, making it ready to paste into an image editor like Paint or even a Word document.
Quick Answers For Capturing Your Screen in Windows 7
Ever need to show an IT person an error message or share a funny meme with a friend? A screenshot is the fastest way to do it. Windows 7 gives you two super-reliable, built-in methods that are perfect for these everyday situations.
The two keyboard shortcuts you'll use most often are:
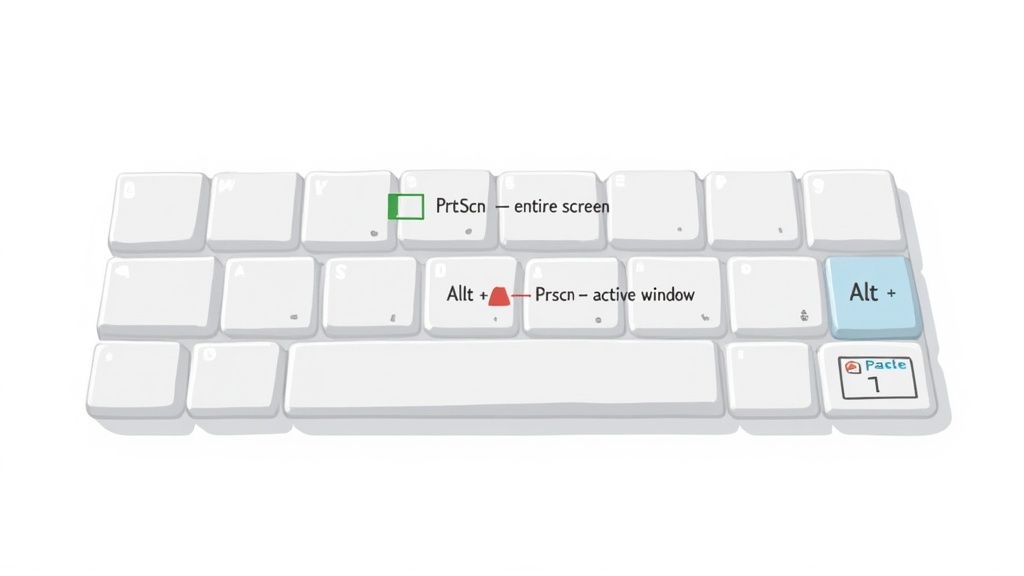
- Print Screen (PrtScn): This is your go-to for capturing everything. It takes a picture of your entire desktop, which is perfect if you need to show the full context of what you're seeing, especially with multiple monitors.
- Alt + Print Screen: This one is more precise. It snags an image of only the active window, which is great for focusing on a single application and keeping other programs or personal information out of the shot.
Choosing Your Capture Method
It's important to remember that after you use either of these shortcuts, the image isn't saved as a file just yet. It's temporarily stored on your computer's clipboard. To save it, you'll need to open a program like MS Paint (just search for it in the Start Menu), paste the image in by pressing Ctrl + V, and then save it from there.
This simple flowchart can help you decide which shortcut to use in a flash.
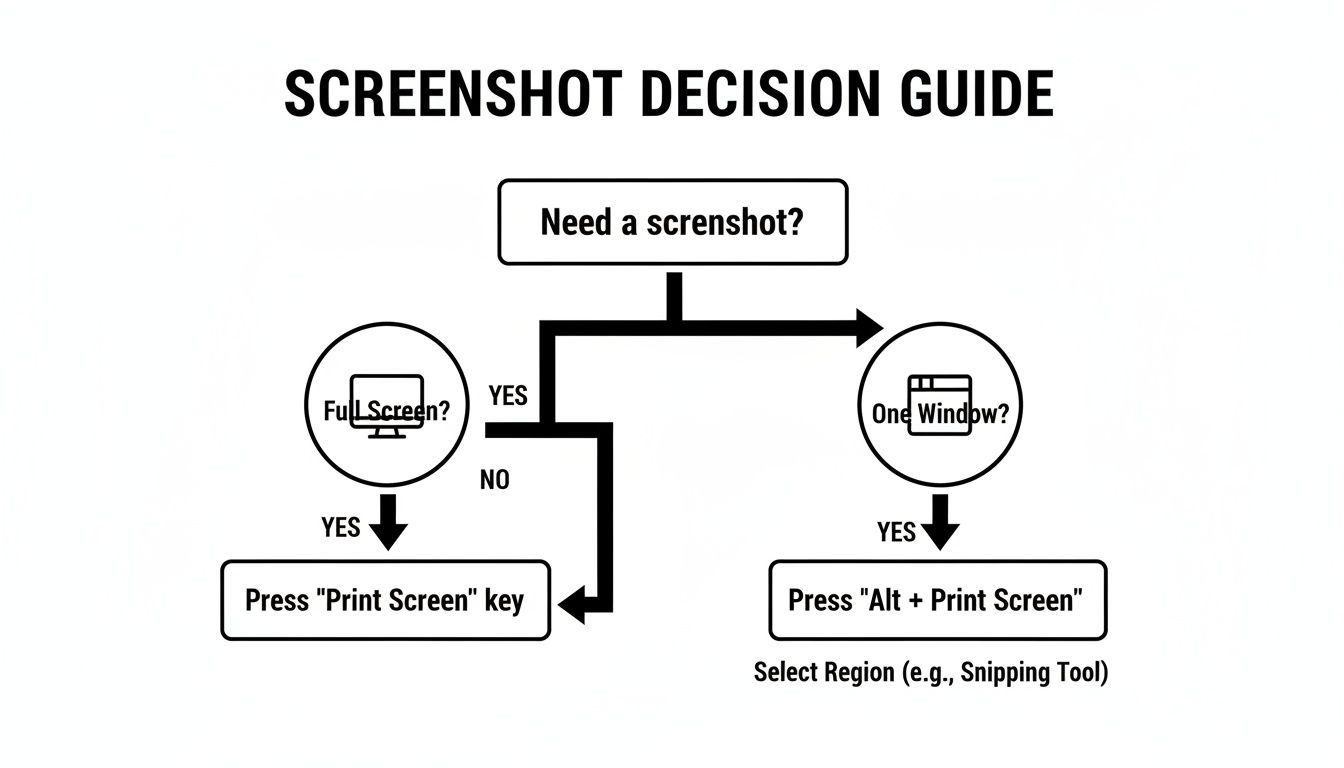
As the graphic shows, picking the right method is straightforward. Do you need the whole screen or just one window? While these clipboard methods are quick and easy, they can't handle everything. For instance, if you need to capture a long, scrolling webpage, you'll need a different tool. In those cases, a browser-based tool designed to capture a full page screenshot is a much better option.
Mastering The Classic Print Screen Method
Long before fancy tools and apps, the Print Screen key was the go-to for capturing your screen in Windows, and it still works like a charm in Windows 7. You’ll usually find it labeled as PrtScn on your keyboard.
Hitting this one key instantly grabs a picture of your entire screen—everything you see, including all your monitors if you have a multi-display setup. The image is copied straight to your clipboard, ready to be pasted elsewhere. It’s the quickest, most direct way to get a visual record of your desktop.
This method is perfect when you need to show someone your complete desktop layout or capture an error message that’s popped up over other windows. Just be mindful that it captures everything, so you might accidentally include personal info or background clutter.
Capturing Just The Active Window
What if you don't want your messy desktop in the shot? Windows 7 has a smarter, more focused shortcut for that.
Just hold down the Alt key while you press PrtScn. This clever combination captures only the window you’re currently working in—the "active" one. It's a fantastic way to zero in on a specific application, like a web browser or a settings panel, without grabbing your taskbar and desktop icons along with it.
These simple hotkeys were a huge part of the Windows 7 experience. The OS was a massive hit, reaching 60% of PCs globally within two years, and these screenshot methods became daily essentials for millions. In fact, archived tech forums show there were over 1.2 million questions about screenshots in the first year alone. You can read more about Windows 7's early market impact on gbnews.com.
Saving Your Screenshot With MS Paint
Okay, so you’ve hit PrtScn or Alt + PrtScn. Your screenshot is now sitting on the clipboard, but it’s not saved as a file yet. You need to paste it into an image editor, and good old MS Paint is perfect for the job.
- First, open Paint. Just click the Start Menu, type "Paint" into the search bar, and hit Enter.
- With Paint open, simply press Ctrl + V to paste your screenshot right onto the canvas.
- Now, you just need to save it. Go to File > Save As. I’d recommend saving as a PNG for the best quality, but JPG is a good choice if you need a smaller file size. Give it a name, and you're done
Unlocking Precision With The Snipping Tool
While the Print Screen key is great for a quick grab of your whole screen, it's often overkill. You end up capturing extra toolbars, background apps, or other junk you have to crop out later. For those times you need more control, Windows 7 has a fantastic built-in utility: the Snipping Tool.
Think of it as your digital pair of scissors, letting you cut out exactly what you need—and nothing you don't.
To find it, just pop open your Start Menu and type "Snipping Tool" in the search box. When you see it, give it a click. Here's a pro tip: if you plan on using this a lot (and you probably will), right-click its icon on your taskbar once it's running and choose Pin this program to taskbar. This keeps it handy for one-click access, saving you a ton of time down the road.
Mastering The Four Capture Modes
When you launch the Snipping Tool, a small window appears. The real magic is hidden behind the little arrow next to the "New" button. Clicking it reveals four distinct capture modes, each designed for a different job. This flexibility is precisely what makes the Snipping Tool a huge step up from the old Print Screen method.
You get to decide exactly what and how you capture.
Here's a quick rundown of what each mode does:
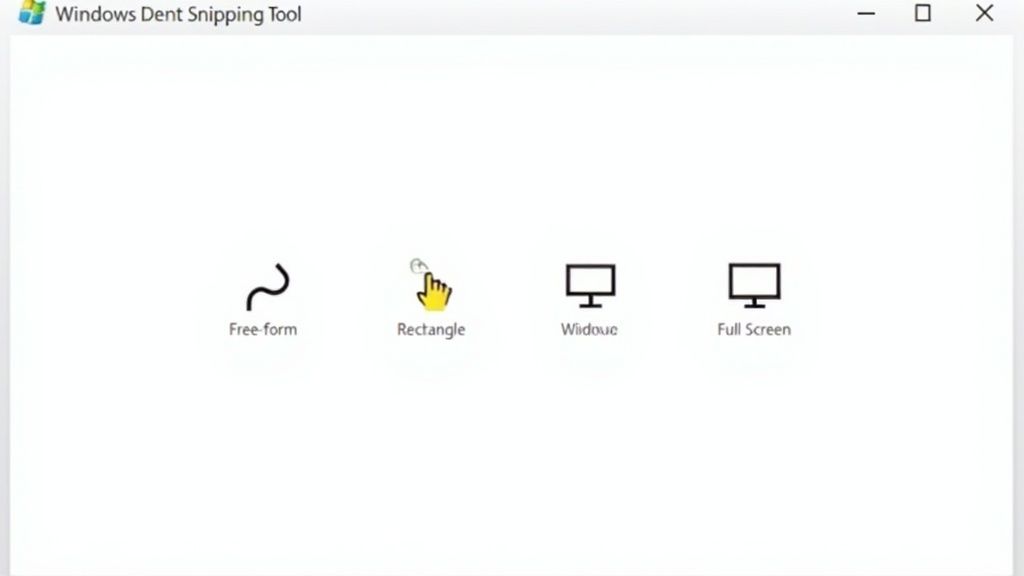
- Free-form Snip: This lets you draw a completely custom shape around anything on your screen. It's perfect for capturing something with an irregular border or when you want to get a bit creative.
- Rectangular Snip: This will likely be your go-to. Just click and drag your mouse to draw a box around the area you want. It's ideal for grabbing a specific paragraph, a user profile picture, or a section of a chart.
- Window Snip: This one is incredibly useful. Your cursor turns into a little hand pointer. Hover over any open window—a browser, a folder, an error message—and click. It will capture that entire window perfectly, leaving out all the background clutter.
- Full-screen Snip: Does exactly what it says on the tin. It works just like hitting the Print Screen key, capturing your entire desktop in one go.
The best part? Once you take a snip, the image doesn't just vanish into your clipboard. It opens directly in the Snipping Tool's own editing window. This is a game-changer compared to the Print Screen workflow. You can immediately grab the pen to circle something important or use the highlighter to draw attention to a key figure before you even save the file. It’s perfect for creating quick how-to guides or marking up a document for a coworker.
Exploring Powerful Third-Party Screenshot Tools
While the classic Snipping Tool and Print Screen shortcuts get the job done for simple captures, sometimes you just need more firepower. This is where third-party screenshot apps really shine, bringing a whole suite of features to the table that can seriously speed up your workflow.
Think about it. Maybe you're a support agent who constantly needs to blur out sensitive customer data before sharing an image. Or you're a writer trying to capture an entire scrolling webpage for a tutorial. In these moments, the standard Windows 7 tools just don't cut it. The best third-party apps fill this void with advanced annotation tools—arrows, text boxes, and blur effects—and even handy features like automatic cloud uploads that create a shareable link in seconds.
For many, the sheer speed of Windows 7's clipboard methods was a game-changer. When the OS launched back in 2009, it saw a staggering 150 million upgrades in just three months, introducing millions to these efficient workflows. By 2015, with Windows 7 holding a 55% global market share, community forums like SuperUser had logged over 500,000 threads about its screenshot functions alone. You can read more about Windows 7's enduring popularity at TechRadar.
When to Consider an Upgrade
The real question is, when should you make the jump? It usually comes down to repetition and complexity. If you find yourself repeatedly opening MS Paint just to add a simple arrow or number some steps, a dedicated tool will save you a ton of time.
Here are a few scenarios where a third-party app really proves its worth:
- Creating step-by-step guides: Quickly stamp numbers, add text, and highlight key areas across a series of screenshots.
- Providing technical support: Instantly obscure private information using a pixelation or blur tool.
- Team collaboration: Forget emailing files. Upload a capture and share the link with your team in one click.
- Recording quick screencasts: Many tools now include basic screen recording, perfect for making short GIFs or video clips.
If your daily work involves more than just a quick grab-and-save, a specialized tool isn't just a luxury—it's a massive productivity boost. It turns a clunky, multi-step process into a smooth, single action.
For anyone who needs professional-grade tools without the hefty price tag, checking out a free Snagit alternative is a great place to start.
Troubleshooting Common Screenshot Problems
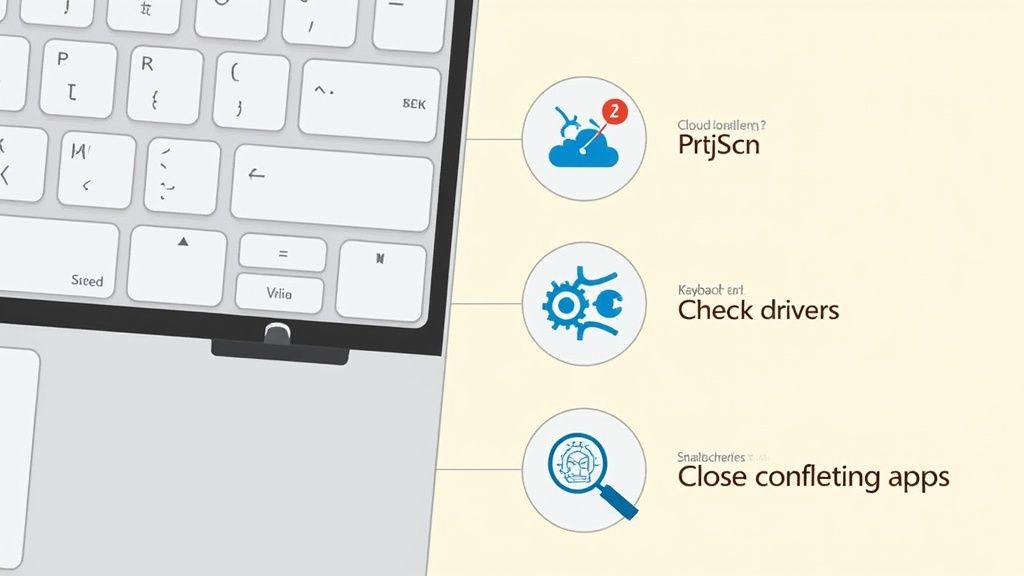
It’s one of those classic tech frustrations: you hit the Print Screen key, and absolutely nothing happens. Before you start thinking your keyboard is dead, there are a few common culprits that can get in the way of a simple screenshot on Windows 7. A quick check usually solves it in minutes.
More often than not, the issue is another program hijacking the key. Cloud storage apps like Dropbox or OneDrive are notorious for this—they often reassign the PrtScn key to automatically save a screenshot directly to their cloud folder. Dive into the settings for these applications first and see if you can disable any screenshot-related hotkeys.
Diagnosing Unresponsive Keys
If a conflicting app isn't the problem, the issue could be with the hardware itself, especially on laptops with compact keyboards. You'll often see the PrtScn key sharing space with another function like Insert or Home.
Here are a couple of things to check:
- Look for an "Fn" Key: On most laptops, you need to press and hold the Fn key (usually near the bottom left) while pressing PrtScn. This toggles the key’s primary function.
- Update Keyboard Drivers: It's a long shot, but outdated or corrupted keyboard drivers can cause strange behavior. You can check for updates in the Device Manager, which you'll find in the Control Panel.
Even years after its prime, Windows 7's core screenshot methods are still widely used. As of November 2025, the OS was still running on 2.94% of desktops globally, and searches for "windows 7 how to take a screenshot" had spiked by 150% in some major markets. It just goes to show how essential these simple, clipboard-based captures remain. You can find more details on Windows version market share on StatCounter.
Don’t forget: The Print Screen key only copies the image to your clipboard. It doesn't actually save a file. If you forget to paste it into Paint or another program, that screenshot is gone as soon as you copy something else.
For those times when you need to capture more than what's visible on screen, like a long, scrolling webpage, the built-in tools just won't cut it. For that, you’ll need a different approach. We've got a great guide on how to take a full page screenshot that covers the best tools for the job.
Got Questions About Taking Screenshots in Windows 7?
Even with the classic tools, you’re bound to run into a few quirks. I’ve seen these same questions pop up time and time again, so let’s get them answered.
Where Did My Screenshot Go?
This is easily the most common point of confusion. When you hit Print Screen or Alt + Print Screen in Windows 7, it doesn't automatically save a file anywhere. Instead, it copies the image to your clipboard—think of it as a temporary holding area.
To actually save it, you need to open an image editor (MS Paint is perfect for this), paste the image with Ctrl + V, and then save it yourself.
The Snipping Tool, on the other hand, works how you’d probably expect. It immediately opens your snip in a new window so you can save it right away.
How Can I Capture Just a Small Part of the Screen?
For this, the Snipping Tool is your best friend. Fire it up and choose the "Rectangular Snip" mode. It lets you click and drag a box around the exact area you want, completely ignoring the rest of the desktop. It’s incredibly handy for grabbing a single chart or a specific error message.
If for some reason you can't use the Snipping Tool, you'll have to do it the old-fashioned way. Capture the active window with Alt + Print Screen, paste it into MS Paint, and then use the Crop tool to trim it down to just the part you need. A bit more work, but it gets the job done.
Why Is My Screenshot Just a Black Box?
Ah, the dreaded black screen. This almost always happens when you're trying to capture something with a hardware overlay, which is common in video players and many games. Your standard screenshot function just can't see this protected content, so it captures a blank space instead.
The quickest fix is usually to dive into the settings of the app you're trying to capture (like your web browser or media player) and turn off "Hardware Acceleration." For games, you're far better off using the game's own built-in screenshot key, if it has one.
If you're looking for a more powerful and modern way to handle screenshots and tons of other browser tasks, you should check out ShiftShift Extensions. Our Full Page Screenshot tool is just one of many utilities built into a single, slick command palette designed to speed up your entire workflow. You can find it at https://shiftshift.app.